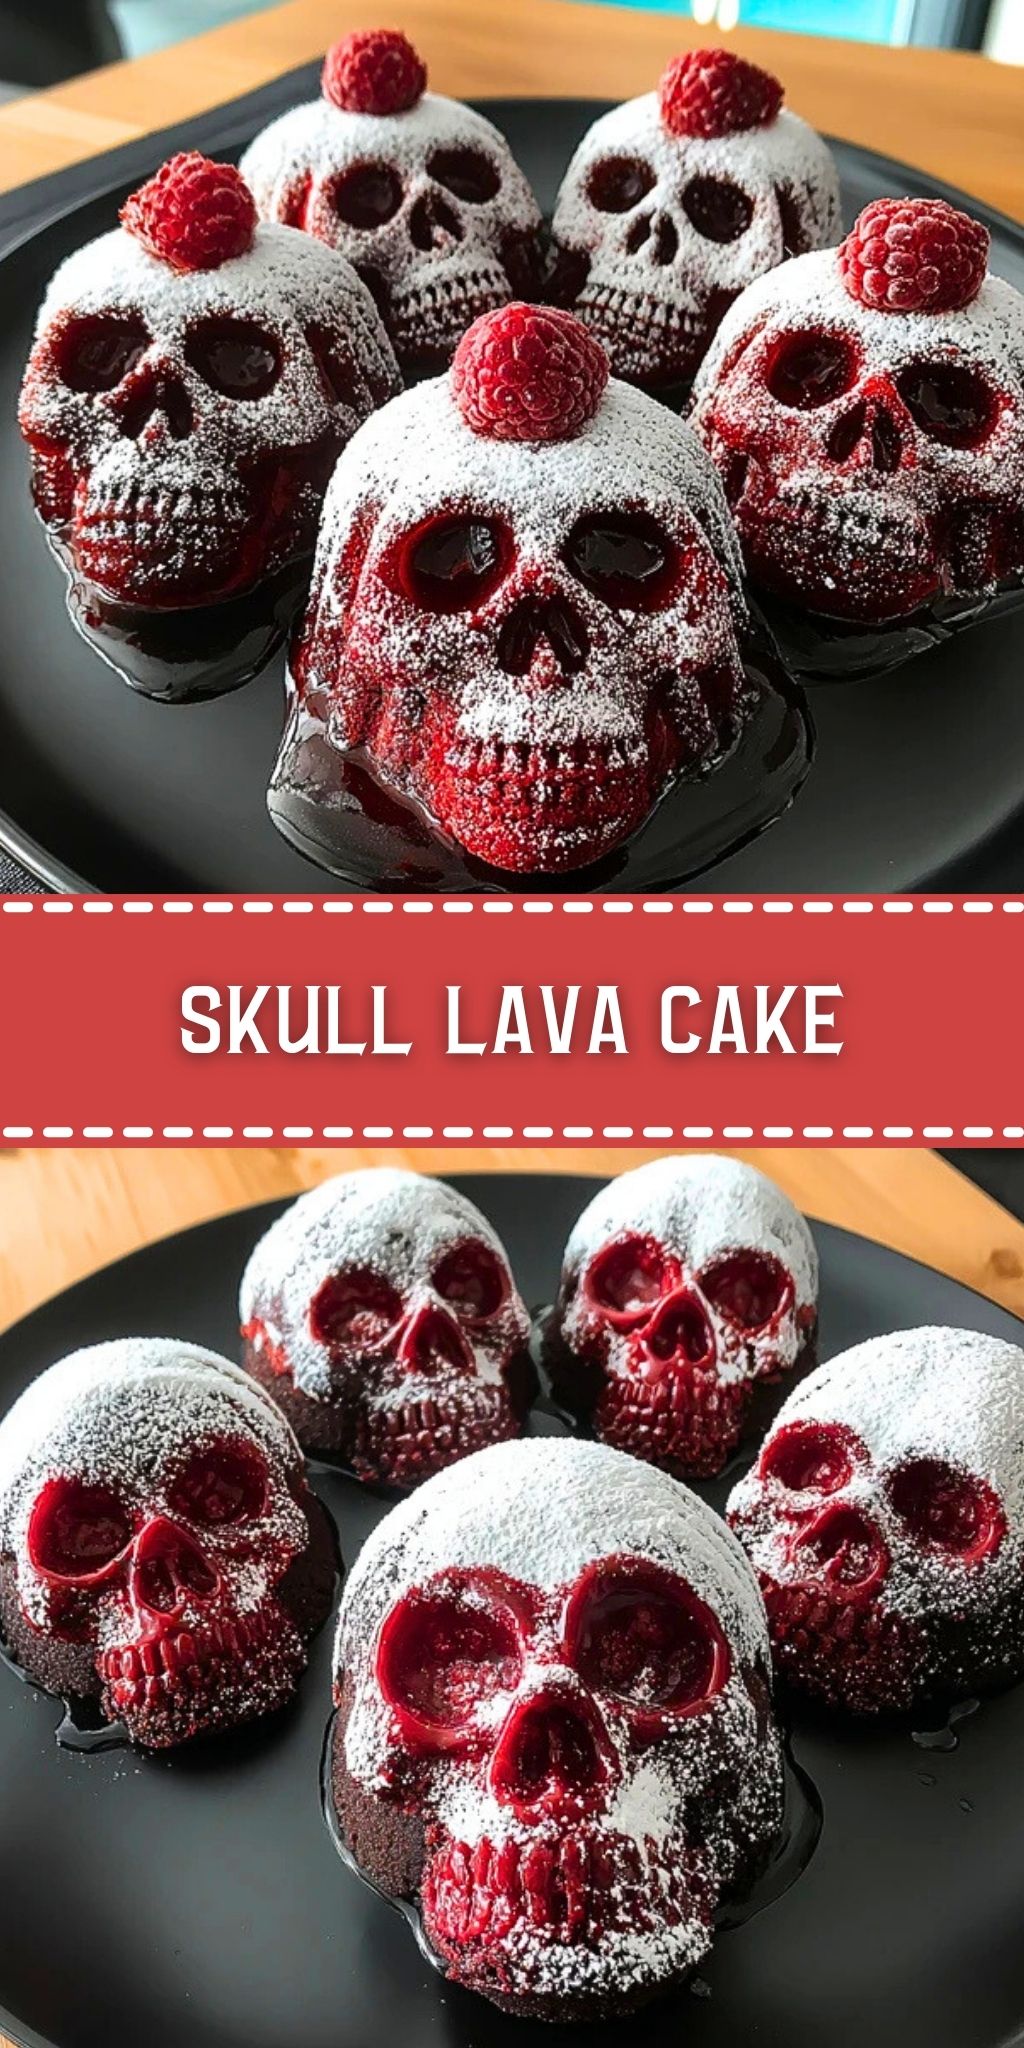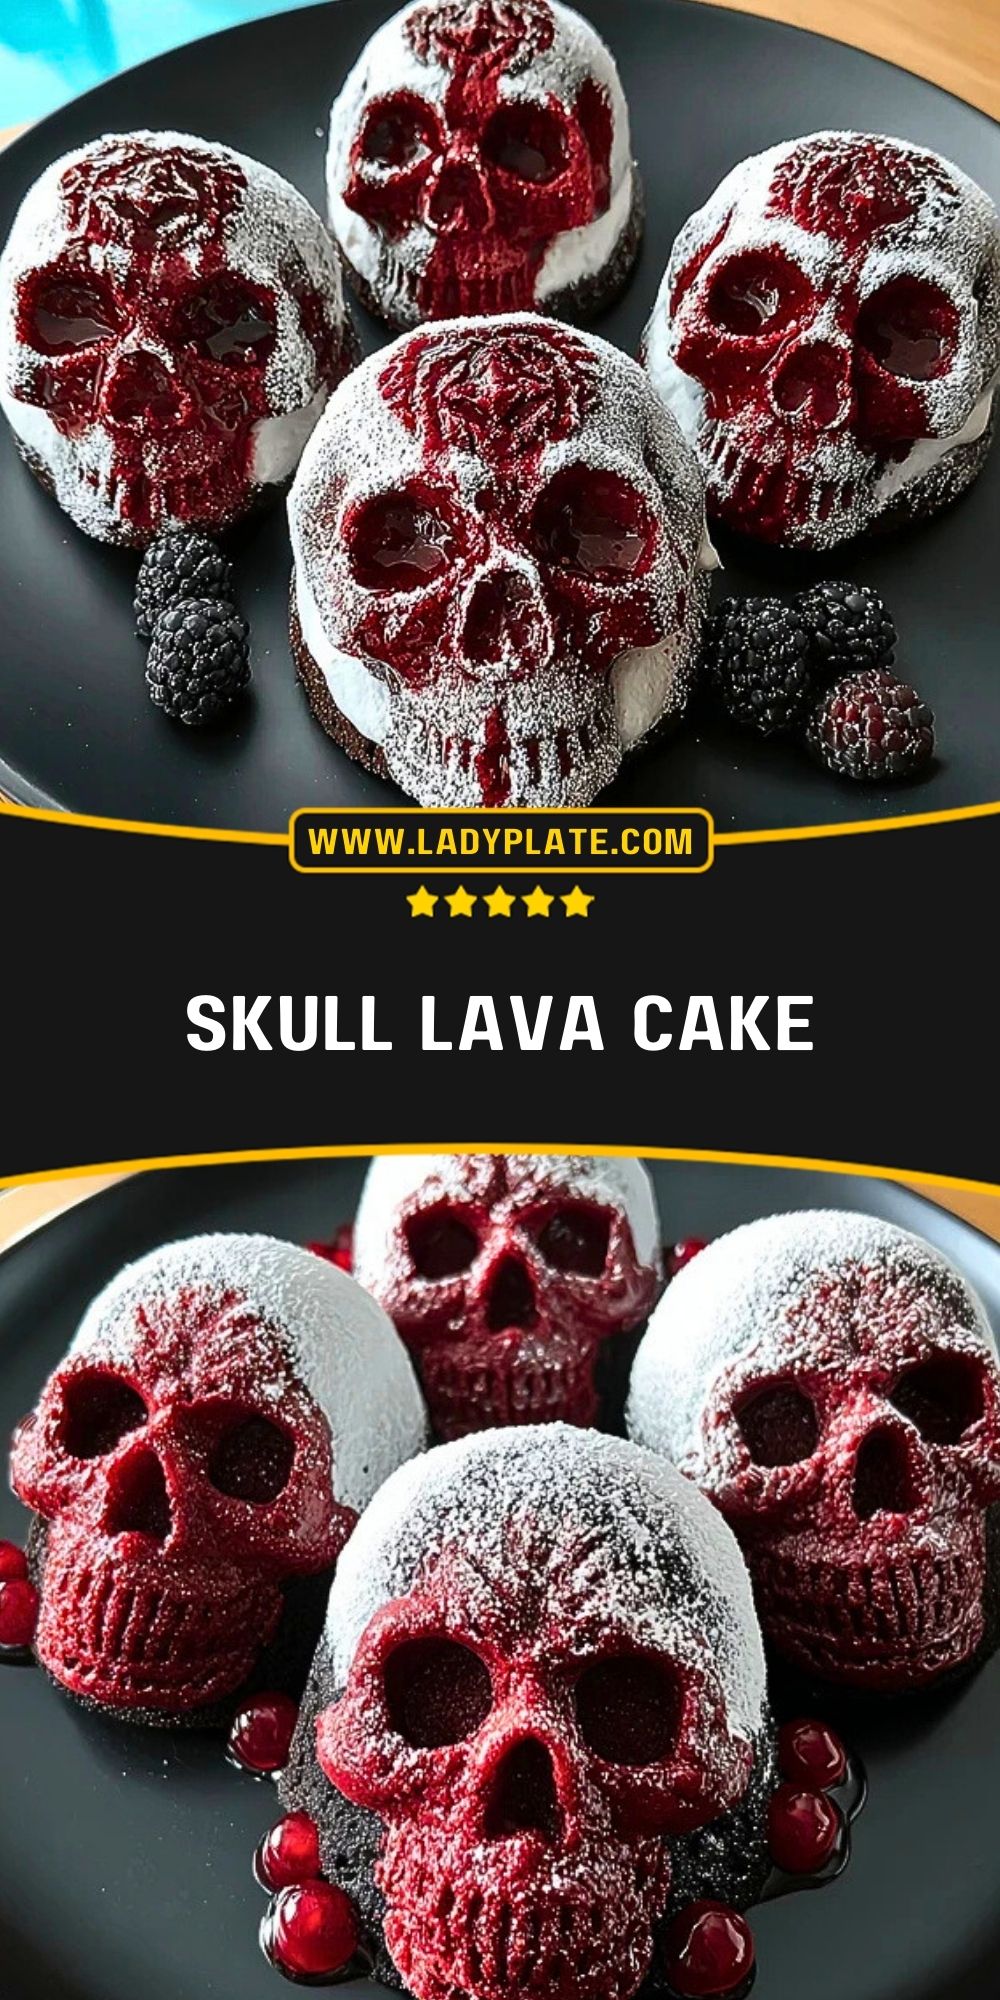
Looking for a dessert that thrills just as much as it satisfies? The Skull Lava Cake is your show-stopping treat, combining the decadence of molten chocolate cake with a spooky presentation that’s perfect for Halloween, gothic parties, or any themed get-together that calls for a dramatic sweet finale.
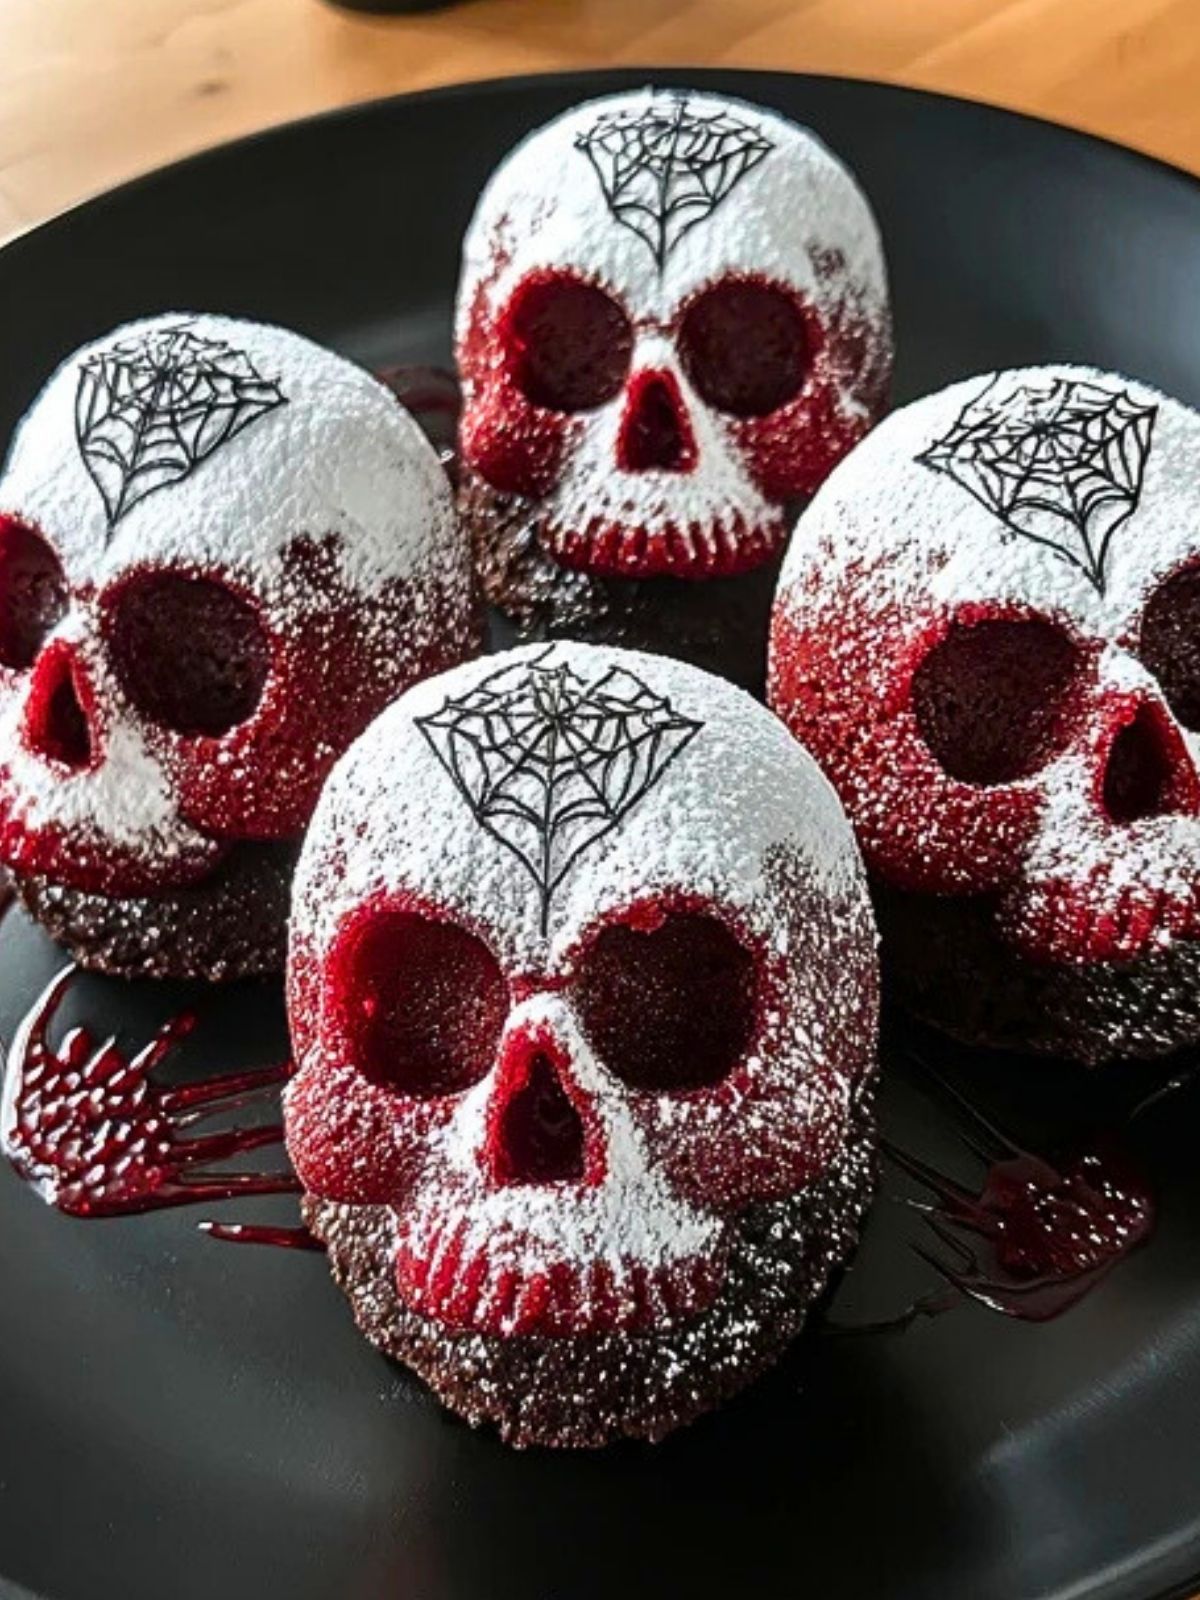
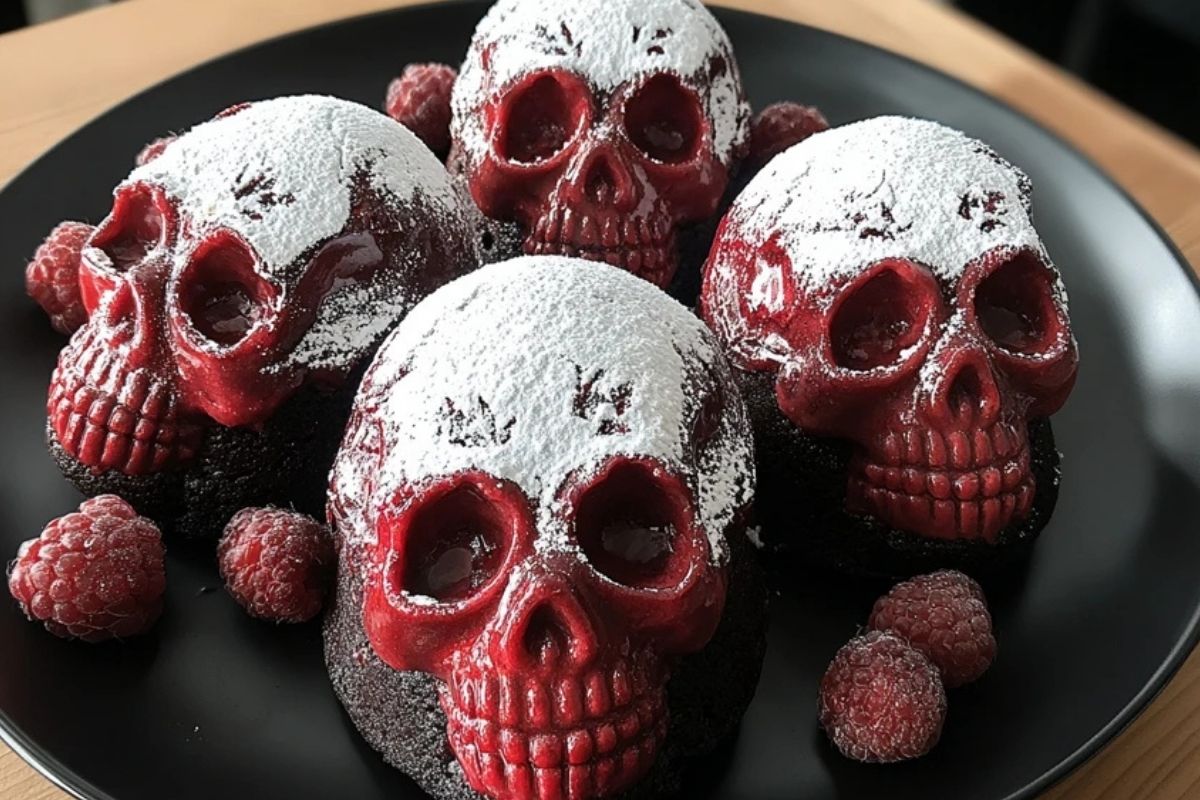
These hauntingly beautiful skull-shaped cakes ooze rich chocolate lava from the inside, while the red velvet exterior gives a blood-red effect that chills and delights in equal measure. With powdered sugar for a ghostly contrast and an optional spiderweb detail for flair, they’re as much a visual masterpiece as they are a dessert.
Preparation Phase & Tools to Use
Before diving into this devilishly delightful bake, it’s essential to gather the right tools to ensure precision, safety, and that stunning skull shape.
Skull-shaped silicone mold: This is the star of the show. It gives the cake its spooky form and ensures every curve and crevice of the skull is captured with clarity.
Mixing bowls: You’ll need at least two—one for the dry ingredients and one for the wet. Using separate bowls helps in achieving a smooth, lump-free batter.
Electric hand mixer or stand mixer: Essential for creaming the butter and sugar together and achieving that airy texture which makes the cake rise properly.
Microwave-safe bowl: For melting the chocolate and butter together—creating that velvety lava center.
Fine mesh sieve: Useful for dusting the powdered sugar smoothly on top for that ghostly skull finish.
Piping bag (optional): If you’re decorating with chocolate web patterns, a piping bag with a fine tip makes the process neater and more controlled.
Cooling rack: To cool your skull cakes evenly after baking and to avoid condensation that might mess with the powdered sugar topping.

Ingredients for the Skull Lava Cake
Each ingredient in this Skull Lava Cake plays a crucial role in balancing taste, texture, and structure, while enhancing the visual drama:
Dark chocolate – The heart of the lava center. Choose high-quality chocolate with at least 70% cocoa for a deep, indulgent flavor.
Unsalted butter – Adds richness and helps emulsify the batter with the chocolate when melted.
Granulated sugar – Sweetens the cake while also creating a slightly crispy edge that contrasts with the gooey center.
Large eggs + egg yolks – These provide structure and create that custardy, soft interior that defines a lava cake.
All-purpose flour – Just a small amount to hold everything together without making the cake dry or dense.
Red food coloring – Gives the cake its signature red velvet horror-themed appearance that highlights the skull mold.
Vanilla extract – A background note that warms and enhances the chocolate profile.
Powdered sugar – For dusting, creating that ghostly, bone-like exterior.
Black melted chocolate or edible marker – Optional, but fantastic for adding spiderweb designs or skull details for Halloween flair.
How To Make the Skull Lava Cake
Step 1: Melt and Mix the Base
In a microwave-safe bowl, combine dark chocolate and butter. Heat in 20-second bursts, stirring between each, until fully melted and smooth. Let it cool slightly.
Step 2: Whisk Eggs and Sugar
In a separate bowl, whisk together granulated sugar, eggs, and yolks until light and slightly frothy. This adds air and softness to the texture.
Step 3: Combine Wet Ingredients
Pour the cooled chocolate mixture into the egg mixture. Add red food coloring and vanilla extract. Stir until fully blended.
Step 4: Add Dry Ingredients
Sift in the flour and fold gently until just combined. Do not overmix—this keeps the center gooey and lava-like.
Step 5: Fill the Molds
Grease your skull silicone molds. Fill each mold 3/4 of the way with the batter. You can also insert a frozen chocolate ganache ball in the center for extra lava effect.
Step 6: Bake to Perfection
Place the mold on a baking sheet and bake at 425°F (220°C) for 10–12 minutes. The edges should be set, but the center should jiggle slightly when moved.
Step 7: Cool and Flip
Allow to cool in the mold for 2–3 minutes before gently unmolding onto a wire rack. Let them rest 5 more minutes.
Step 8: Final Touches
Dust with powdered sugar while slightly warm. Decorate with chocolate webs or spider designs using a piping bag or edible marker.
How to Serve and Store Skull Lava Cake
The Skull Lava Cake is best served warm, ideally within 5–10 minutes of unmolding. This is when the lava center is at its most luscious and gooey, creating that dramatic molten flow when sliced. Pair it with a scoop of vanilla bean ice cream or a swirl of whipped cream to balance the richness. For an eerie effect, serve over raspberry coulis for a ‘bloody’ presentation.
To store leftovers, allow the cakes to cool completely, then place them in an airtight container. Refrigerate for up to 3 days. Reheat in the microwave for 20–30 seconds to reactivate the gooey center. For longer storage, freeze them individually wrapped, then reheat straight from frozen for 1 minute in the microwave or 8–10 minutes in a 350°F (175°C) oven.
Frequently Asked Questions
How do I prevent the lava center from overcooking?
Bake just until the edges are firm but the centers still jiggle slightly. Every oven is different, so test with one skull first before doing a full batch.
Can I make these without a skull mold?
Yes, you can use ramekins or cupcake molds, but you’ll lose the signature spooky effect. The skull mold is what makes this dessert so thematically powerful.
Is there a substitute for red food coloring?
You can use beet powder or natural food dyes, though the color may be less vibrant. For dramatic contrast, red gel coloring works best.
Can I make these ahead of time?
Absolutely. Prepare the batter and fill the molds, then refrigerate unbaked for up to 24 hours. Bake just before serving for best results.
What type of chocolate should I use?
Opt for high-quality dark chocolate—at least 70% cocoa—for that rich, bittersweet flavor. Avoid chocolate chips, as they may contain stabilizers that prevent smooth melting.
Are these safe for kids?
Yes! They’re just cake—no scary ingredients—though you might want to skip the very dark chocolate for younger taste buds and adjust the sweetness.
Want More Halloween Dessert Ideas?
If spooky treats are your thing, don’t stop with these Skull Lava Cakes.
You might also enjoy the Decadent Chocolate S’mores Cupcakes, filled with gooey marshmallow centers and perfect for campfire-themed nights. Or try the Cheesecake Deviled Strawberries—a playful, blood-red bite-sized option with a sweet cream filling.
For more creepy yet creative ideas, consider the No-Bake Mini Banana Cream Pies for a fuss-free make-ahead treat. The Cinnamon Donut Bread offers a comforting fall flavor with a hint of spice that fits right in with October bakes. And if you’re feeling adventurous, the Mini Cinnamon Roll Cheesecakes are a hauntingly good mash-up of two classics.
Pin and Tell Me How Yours Turned Out
You can save this to your Halloween or dessert boards for next time. Just hit the Pin button to keep the idea alive.
If you make it, I’d love to hear how it turned out. Did your skulls look extra spooky? Did you add your own artistic twist with the webs? Drop a comment below or tag me. I’m always thrilled to see what you bake up.
For more creative dessert ideas, visit my Pinterest: LadyPlate Recipes on Pinterest

Skull Lava Cake
- Total Time: 27 minutes
- Yield: 4 cakes
- Diet: Vegetarian
Description
These Skull Lava Cakes are a hauntingly decadent dessert perfect for Halloween or any gothic-themed celebration. With a rich molten chocolate center, red velvet coloring, and ghostly powdered sugar details, they’re as thrilling to look at as they are to eat. Bake them fresh and serve warm for a dramatic, crowd-pleasing effect.
Ingredients
4 oz dark chocolate (70% cocoa)
1/2 cup unsalted butter
1/2 cup granulated sugar
2 large eggs
2 egg yolks
1/4 cup all-purpose flour
1 tsp vanilla extract
1 tsp red food coloring
2 tbsp powdered sugar (for dusting)
2 tbsp black melted chocolate or edible marker (optional for decoration)
Instructions
1. In a microwave-safe bowl, melt the dark chocolate and butter in 20-second bursts, stirring each time, until smooth.
2. In a separate bowl, whisk together the granulated sugar, eggs, and egg yolks until light and frothy.
3. Combine the cooled chocolate mixture with the egg mixture. Stir in red food coloring and vanilla extract.
4. Sift the flour into the mixture and gently fold until just combined.
5. Grease skull-shaped silicone molds and fill each 3/4 of the way with batter. Optional: insert a frozen ganache center.
6. Bake at 425°F (220°C) for 10–12 minutes, until edges are set and centers slightly jiggly.
7. Cool in molds for 2–3 minutes, then unmold onto a wire rack. Let rest for 5 more minutes.
8. Dust with powdered sugar and decorate with spiderwebs using melted chocolate or edible marker.
Notes
Use high-quality chocolate for best results—chips are not recommended due to stabilizers.
Let the cakes rest a few minutes after baking before unmolding to avoid cracks.
To ensure a dramatic lava center, don’t overbake—edges firm, center jiggly is key.
- Prep Time: 15 minutes
- Cook Time: 12 minutes
- Category: Dessert
- Method: Baking
- Cuisine: American
Nutrition
- Serving Size: 1 cake
- Calories: 410
- Sugar: 23g
- Sodium: 48mg
- Fat: 30g
- Saturated Fat: 18g
- Unsaturated Fat: 11g
- Trans Fat: 0g
- Carbohydrates: 32g
- Fiber: 2g
- Protein: 6g
- Cholesterol: 175mg