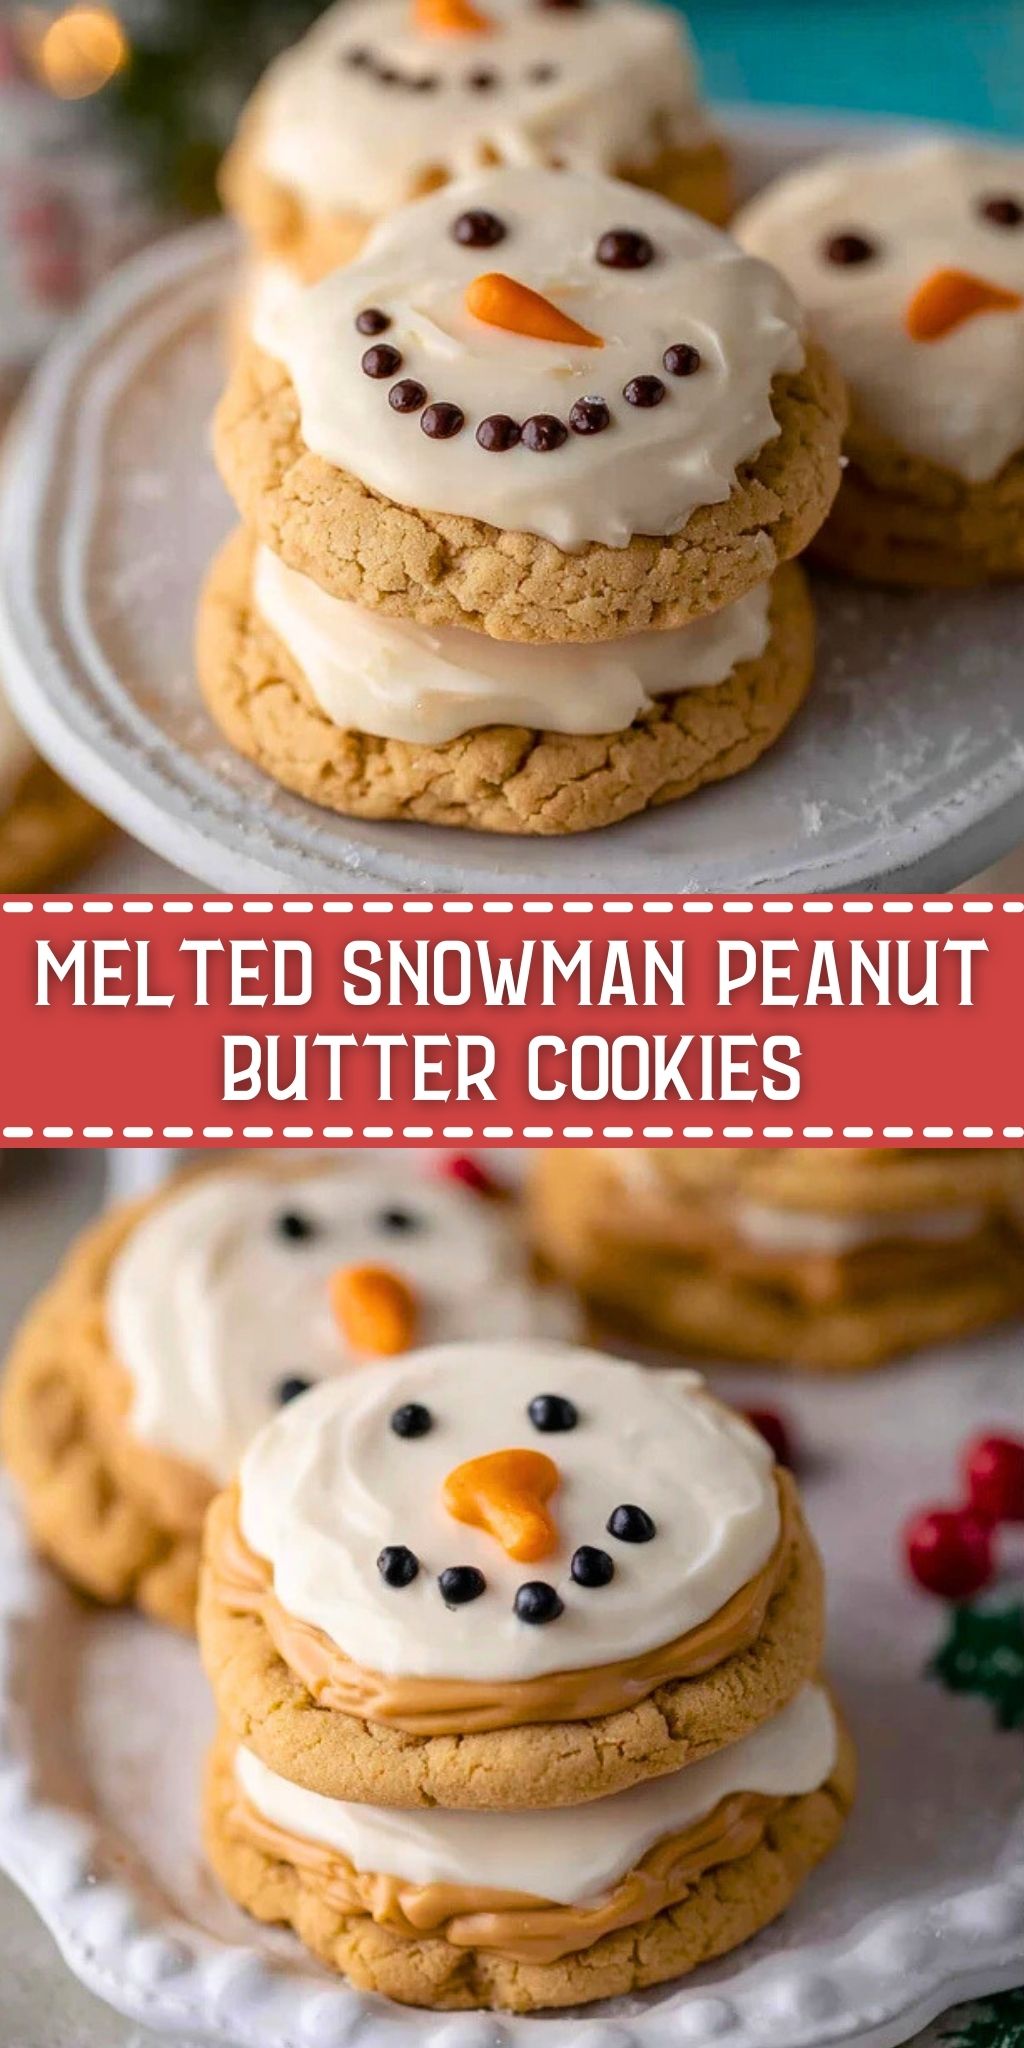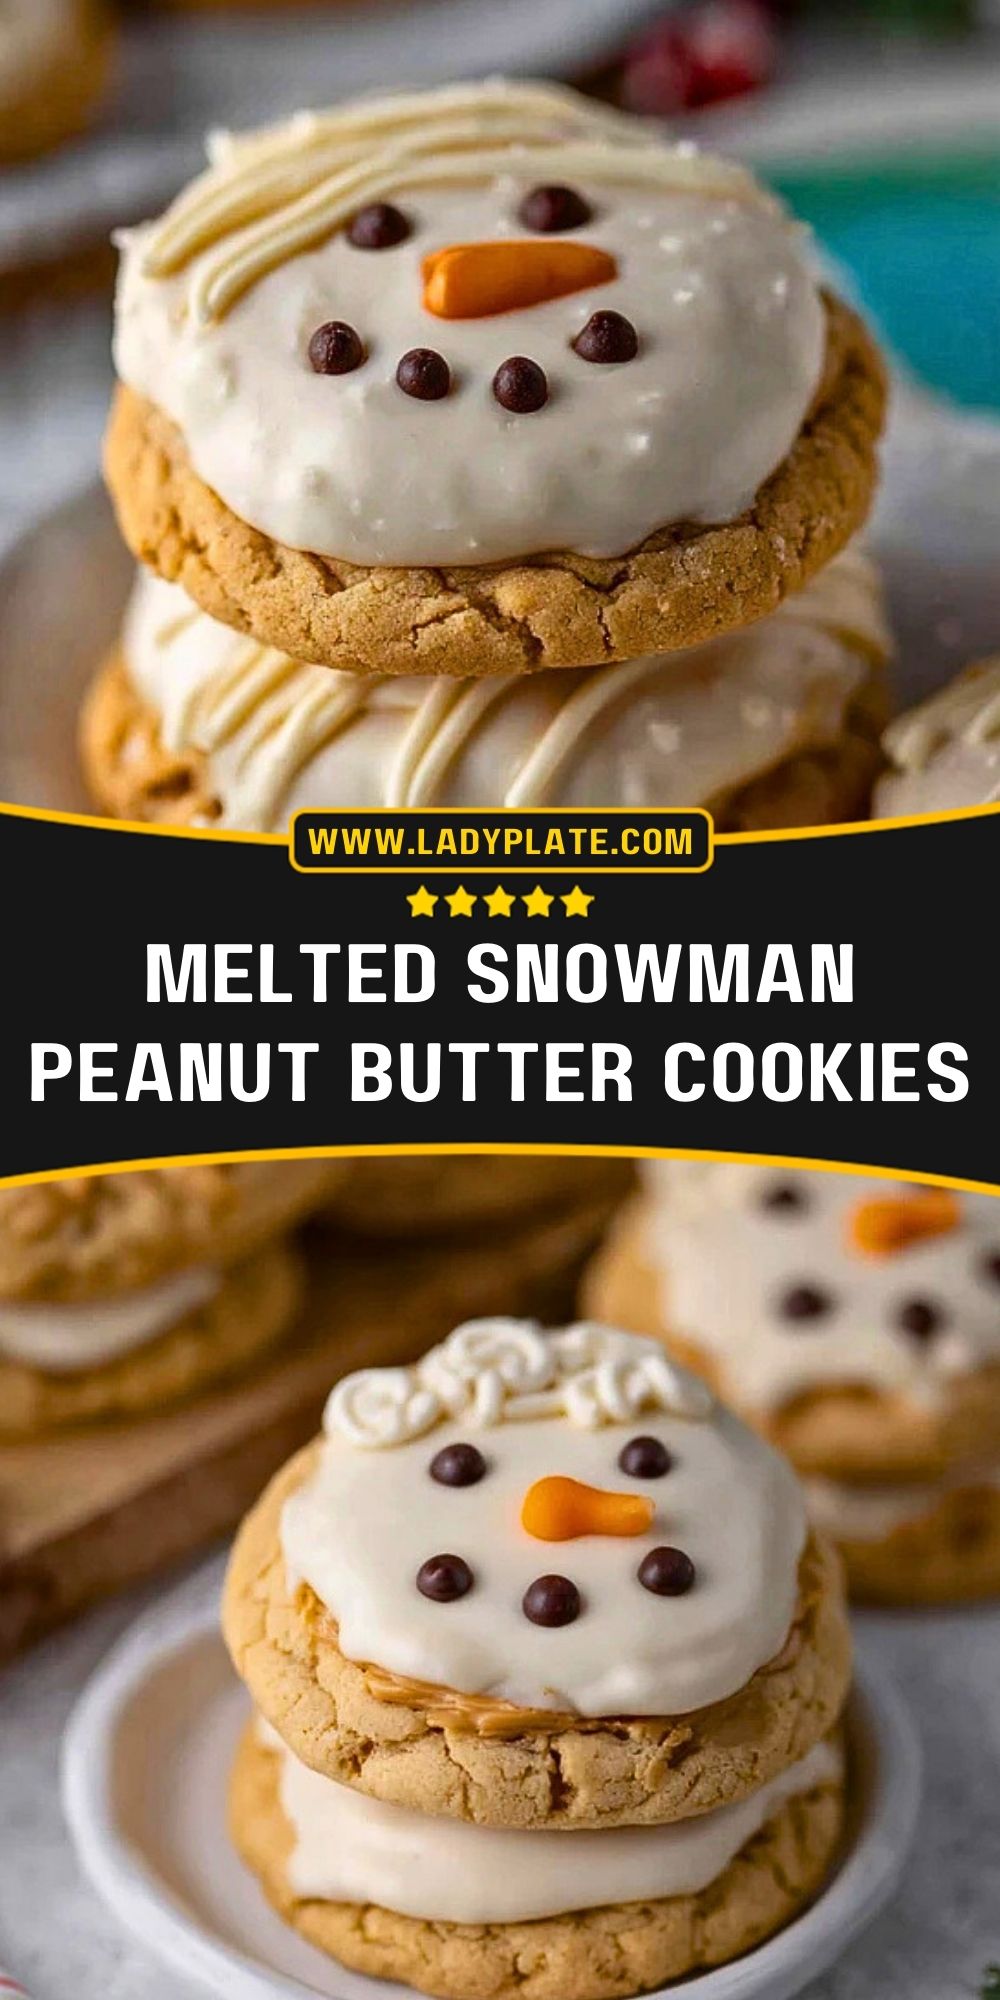
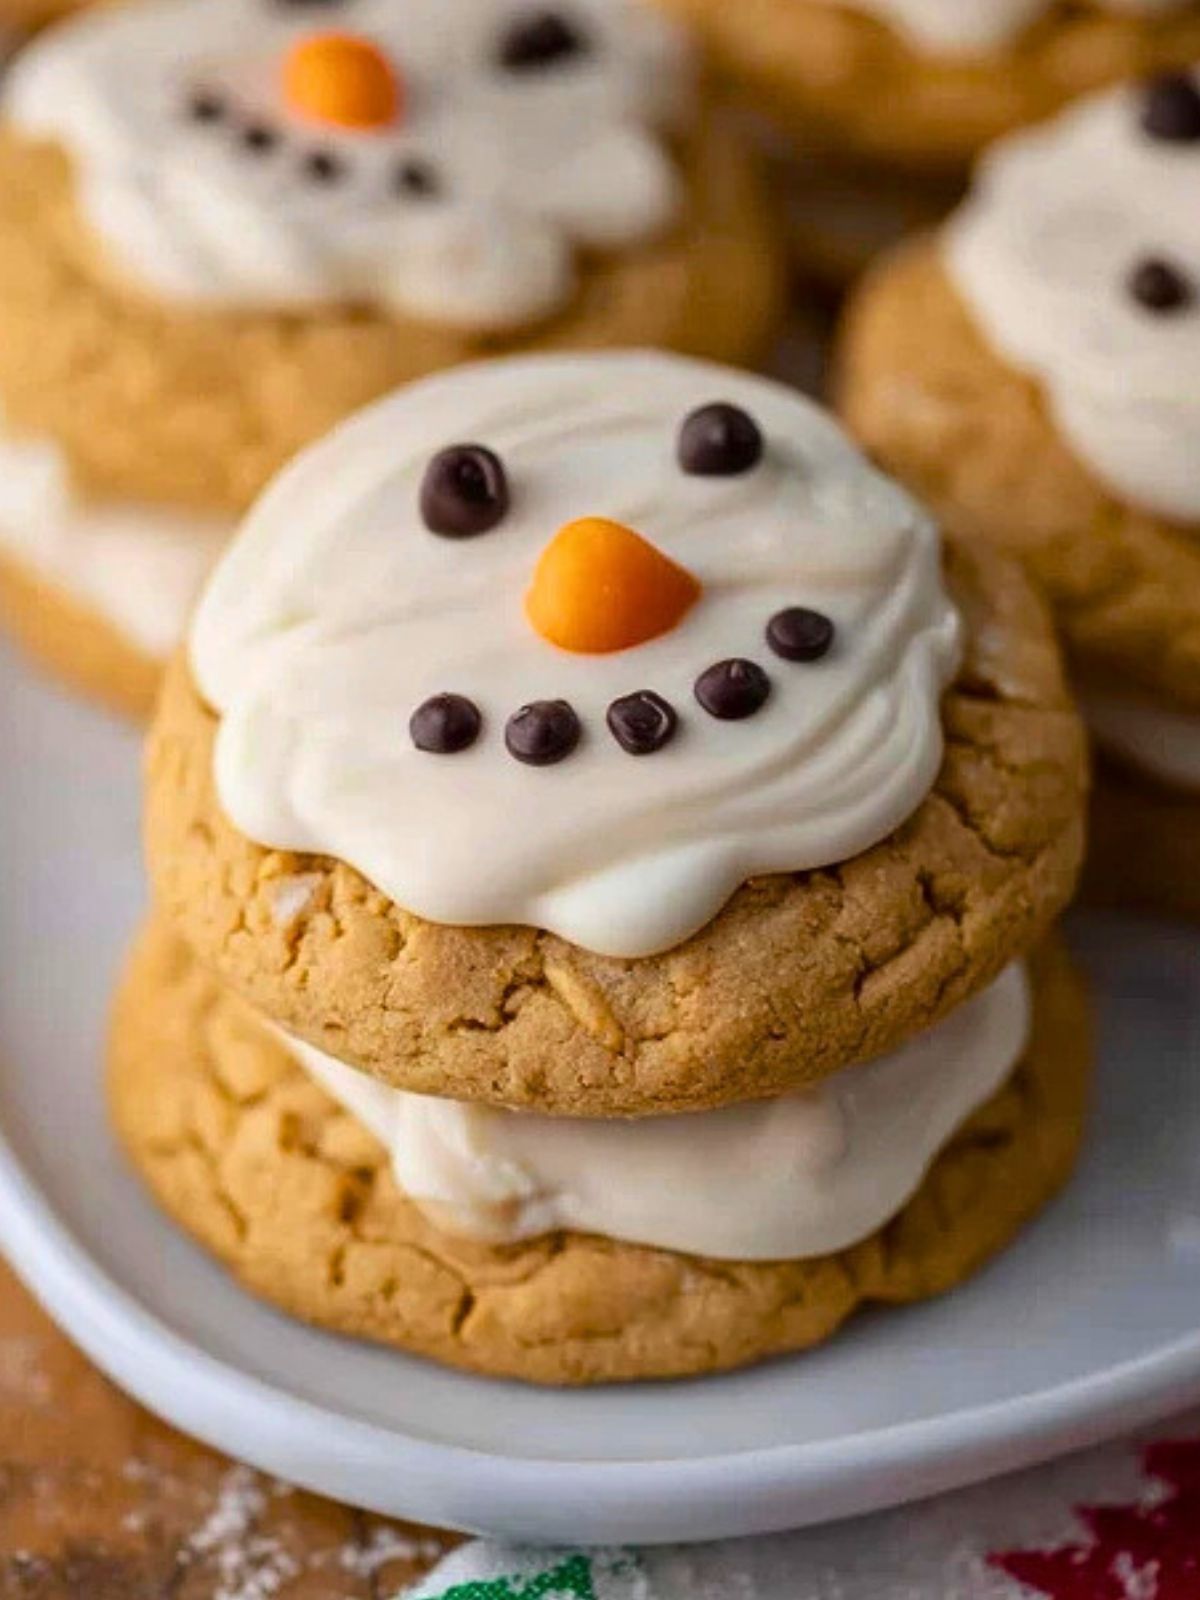
How do you turn a classic cookie into a whimsical winter treat that makes everyone smile? Meet these Melted Snowman Peanut Butter Cookies—a playful spin on soft, chewy peanut butter cookies that melt into festive fun. With creamy frosting and charming snowman faces, they’re the perfect addition to your holiday baking list.
These cookies are a conversation starter at any party, easy enough for kids to help decorate, and guaranteed to vanish from the plate. Whether you’re baking for a cookie exchange or just want something cheerful with your cocoa, this is the kind of recipe that becomes tradition year after year.
Preparation Phase & Tools to Use
To make these cheerful snowman cookies come to life, start by organizing your key tools. A stand mixer or hand mixer is essential for achieving that creamy, well-blended peanut butter dough. You’ll also want a sturdy baking sheet lined with parchment paper to ensure even baking and prevent sticking.
For decoration, small offset spatulas or butter knives help spread the white frosting smoothly over each cookie. A piping bag (or zip-top bag with the corner snipped) will give you precision when adding the snowman face details, while a cooling rack allows the cookies to set without becoming soggy on the bottom. Lastly, grab a small bowl for holding your mini chocolate chips and orange candies—you’ll be reaching for them a lot as you build each little snowman face.

Ingredients for the Melted Snowman Peanut Butter Cookies
Peanut Butter – This is the base flavor and gives the cookies their soft, nutty richness. Use creamy peanut butter for a smoother texture.
Butter – Unsalted butter adds moisture and depth. Creaming it with sugar ensures the cookies bake up fluffy and light.
Granulated Sugar and Brown Sugar – The combination brings the right amount of sweetness and chew. Brown sugar also lends a bit of molasses flavor.
Egg – Acts as a binder and helps create structure in the cookie.
Vanilla Extract – Just a splash to enhance all the warm, cozy flavors.
All-Purpose Flour – The backbone of your cookie dough, giving it shape and stability.
Baking Soda and Salt – Baking soda ensures a soft rise while salt balances the sweetness.
White Frosting – Used to create the “melted snow” effect. You can use store-bought or homemade.
Mini Chocolate Chips – These are perfect for snowman eyes and smiles. They’re small enough to keep the design cute and detailed.
Orange Candies or Icing – To make the snowman’s carrot nose. Candy-coated sunflower seeds or orange icing work perfectly.
How To Make the Melted Snowman Peanut Butter Cookies
Step 1: Cream the Base
In a mixing bowl, beat together the butter, peanut butter, granulated sugar, and brown sugar until the mixture is light and fluffy. This step aerates the dough and gives the cookies a tender crumb.
Step 2: Add the Egg and Vanilla
Crack in the egg and pour in the vanilla extract. Beat until well combined. This helps bind all the ingredients together.
Step 3: Fold in Dry Ingredients
In a separate bowl, whisk the flour, baking soda, and salt. Gradually mix these dry ingredients into the wet mixture until a soft dough forms.
Step 4: Shape and Bake
Scoop tablespoon-sized portions of dough onto a lined baking sheet. Roll into balls and flatten slightly. Bake at 350°F (175°C) for 9–11 minutes or until the edges are lightly golden.
Step 5: Cool and Frost
Let the cookies cool completely on a wire rack. Once cooled, spread white frosting on top in a blob shape to mimic a melting snowman.
Step 6: Decorate the Faces
Use mini chocolate chips for eyes and a smile, and orange candy or icing to create a carrot nose. You can get creative with hats or scarves if desired.
How to Serve and Store Melted Snowman Peanut Butter Cookies
These cookies shine brightest at holiday parties, cookie exchanges, or as edible gifts wrapped in cellophane with festive ribbon. Serve them on a platter with a cup of hot cocoa or warm spiced cider. Their playful appearance makes them especially delightful for kids’ gatherings or snowy weekend baking fun.
To store, place the cookies in a single layer in an airtight container to protect the delicate frosting designs. If stacking is necessary, use parchment paper between layers. They’ll stay fresh at room temperature for up to 4 days. For longer storage, refrigerate for up to a week or freeze the undecorated cookies for up to 3 months, then decorate after thawing.
Frequently Asked Questions
What kind of peanut butter should I use?
Creamy peanut butter works best to achieve the smooth, soft texture in the cookies. Avoid natural peanut butter, which tends to separate and can affect consistency.
Can I make the cookies ahead of time?
Yes! You can bake and freeze the plain cookies for up to 3 months. Decorate them closer to serving so the frosting stays fresh and intact.
How do I get the frosting to look “melted”?
Use a small spoon or spatula to gently spread the frosting in an irregular shape. Don’t aim for perfect circles—the wonkier the better for that melted look!
Can kids help decorate these cookies?
Absolutely! This recipe is a great way to get kids involved. Let them add the eyes, noses, and smiles with chocolate chips and candies.
What can I use instead of mini chocolate chips?
You can also use small candy eyes or even pipe dots of melted chocolate using a piping bag or zip-top bag with the corner snipped.
Are these cookies good for shipping?
Because of the soft frosting, they’re not ideal for long-distance mailing. If shipping, stick with the undecorated cookies and frost upon arrival.
Want More Festive Cookie Ideas?
If you loved these Melted Snowman Peanut Butter Cookies, here are a few more cheerful treats to brighten your baking tray.
Try the Thick and Chewy Peanut Butter Cookies for a classic bite that melts in your mouth. For a fruity, seasonal twist, the Cheesecake Deviled Strawberries offer a creamy, no-bake delight.
Feeling extra festive? Whip up a batch of Mini Cinnamon Roll Cheesecakes or go for playful texture with Rice Krispie Chocolate Chip Cookies. And for something fun and quick, the Easy Jello Meringue Cookies are light, crisp, and kid-approved.
Pin and Tell Me How Yours Turned Out
You can save this idea to your holiday cookie board so it’s easy to find later. Just click the Pin button below.
If you bake them, leave a comment or tag me—I’d love to see how your snowmen turned out! Did you give them scarves? Little hats? More decorations? Let’s keep the creativity going.
For more daily recipes and baking inspiration, follow me on Pinterest at LadyPlate.


Melted Snowman Peanut Butter Cookies
- Total Time: 25 minutes
- Yield: 24 cookies
- Diet: Vegetarian
Description
These Melted Snowman Peanut Butter Cookies are the ultimate holiday crowd-pleaser—soft, chewy peanut butter cookies topped with whimsical melted snowman faces made from frosting, mini chocolate chips, and orange candy noses. Perfect for holiday parties, cookie exchanges, or baking with kids, they bring festive fun and irresistible flavor.
Ingredients
1/2 cup unsalted butter
1/2 cup creamy peanut butter
1/2 cup granulated sugar
1/2 cup brown sugar
1 large egg
1 teaspoon vanilla extract
1 1/4 cups all-purpose flour
3/4 teaspoon baking soda
1/4 teaspoon salt
1 cup white frosting (store-bought or homemade)
1/3 cup mini chocolate chips
12 orange candies or orange icing for noses
Instructions
1. Preheat oven to 350°F (175°C) and line a baking sheet with parchment paper.
2. In a large mixing bowl, beat together the butter, peanut butter, granulated sugar, and brown sugar until light and fluffy.
3. Add in the egg and vanilla extract. Beat until fully incorporated.
4. In a separate bowl, whisk together the flour, baking soda, and salt.
5. Gradually mix the dry ingredients into the wet mixture until a soft dough forms.
6. Scoop tablespoon-sized amounts of dough and roll into balls. Place them 2 inches apart on the baking sheet and slightly flatten each one.
7. Bake for 9–11 minutes or until edges are lightly golden. Remove from oven and cool completely on a wire rack.
8. Once cooled, spread white frosting on top in a blobby shape to mimic melting snow.
9. Decorate with mini chocolate chips for eyes and smiles, and orange candies for noses. Add extra touches like hats or scarves if desired.
10. Let frosting set before serving or storing.
Notes
For the most authentic look, spread the frosting while it’s slightly soft—room temp helps it flow naturally.
Use candy-coated sunflower seeds for the cutest, most convincing snowman noses.
Let the cookies cool completely before frosting or decorating, or the frosting will melt too much.
- Prep Time: 15 minutes
- Cook Time: 10 minutes
- Category: Dessert
- Method: Baking
- Cuisine: American
Nutrition
- Serving Size: 1 cookie
- Calories: 170
- Sugar: 14g
- Sodium: 120mg
- Fat: 9g
- Saturated Fat: 3.5g
- Unsaturated Fat: 5g
- Trans Fat: 0g
- Carbohydrates: 21g
- Fiber: 1g
- Protein: 3g
- Cholesterol: 15mg