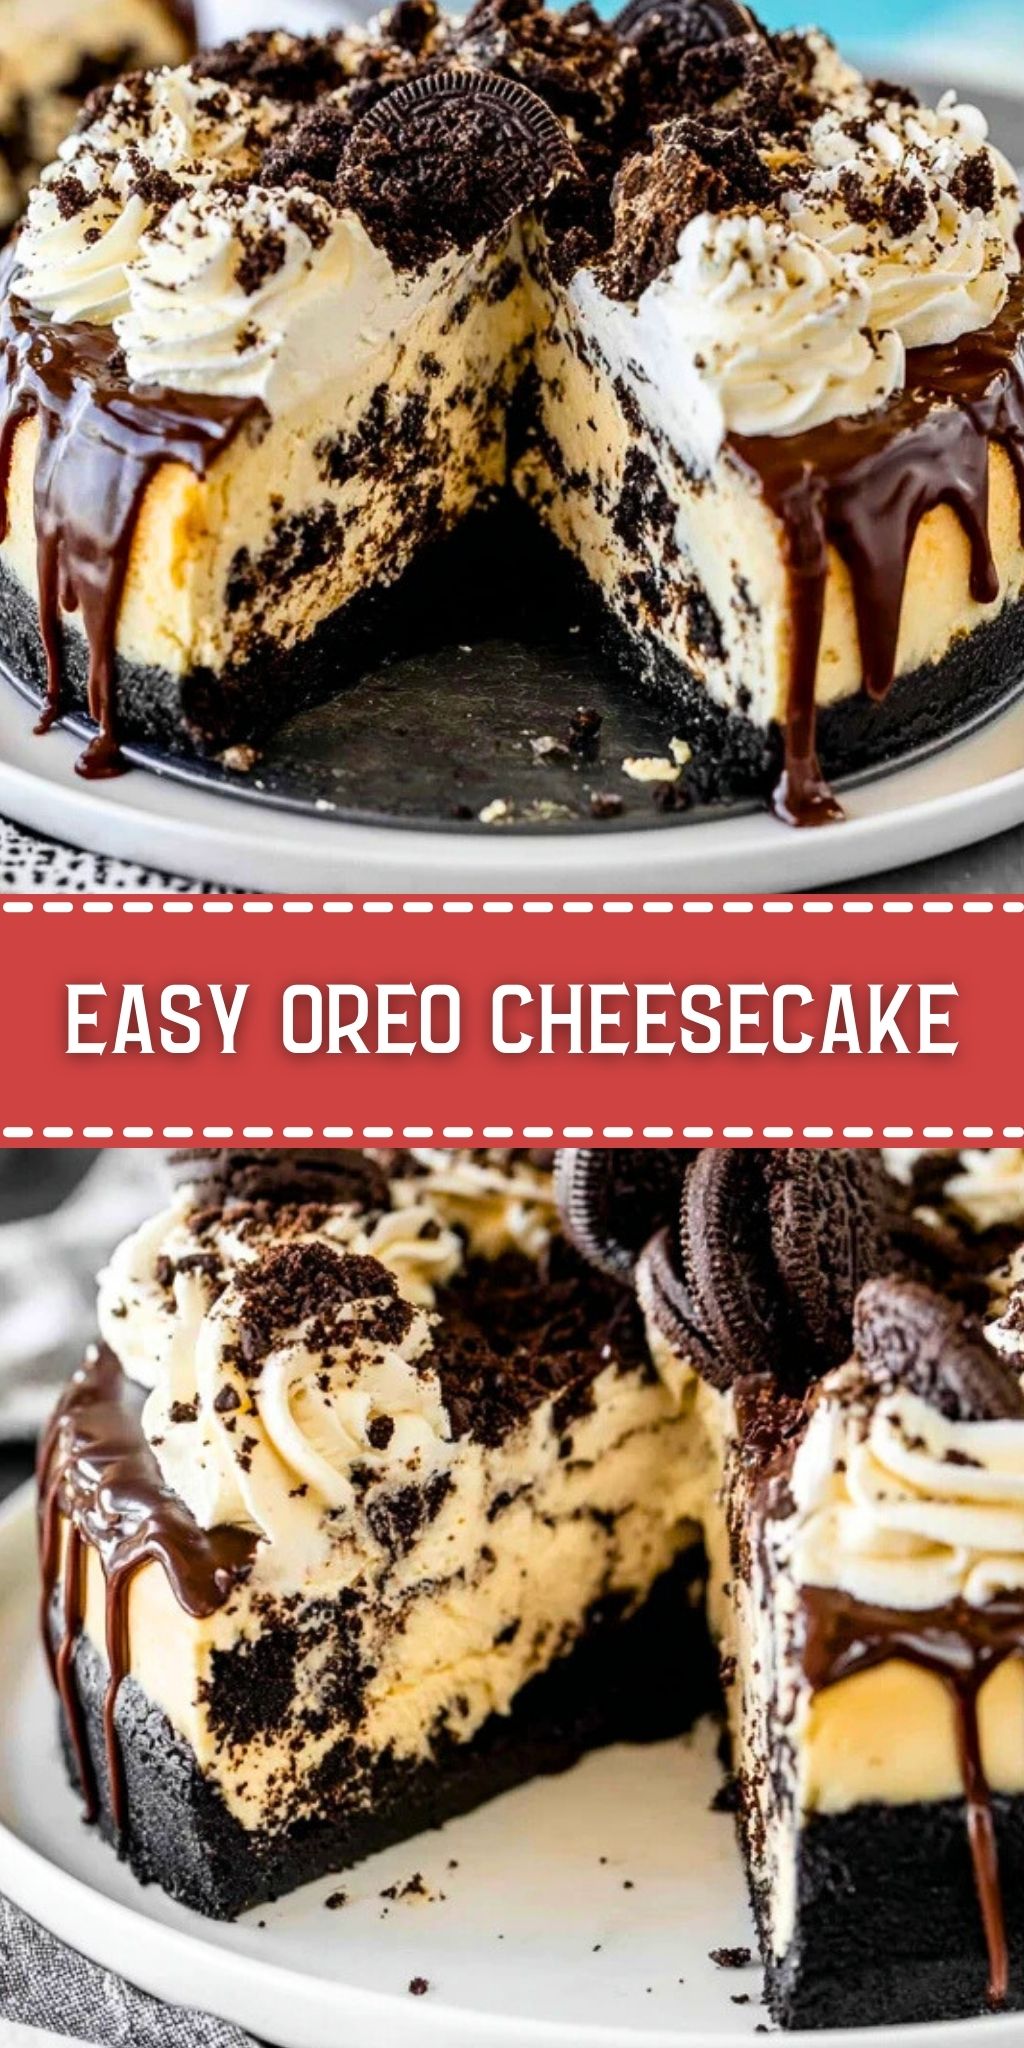
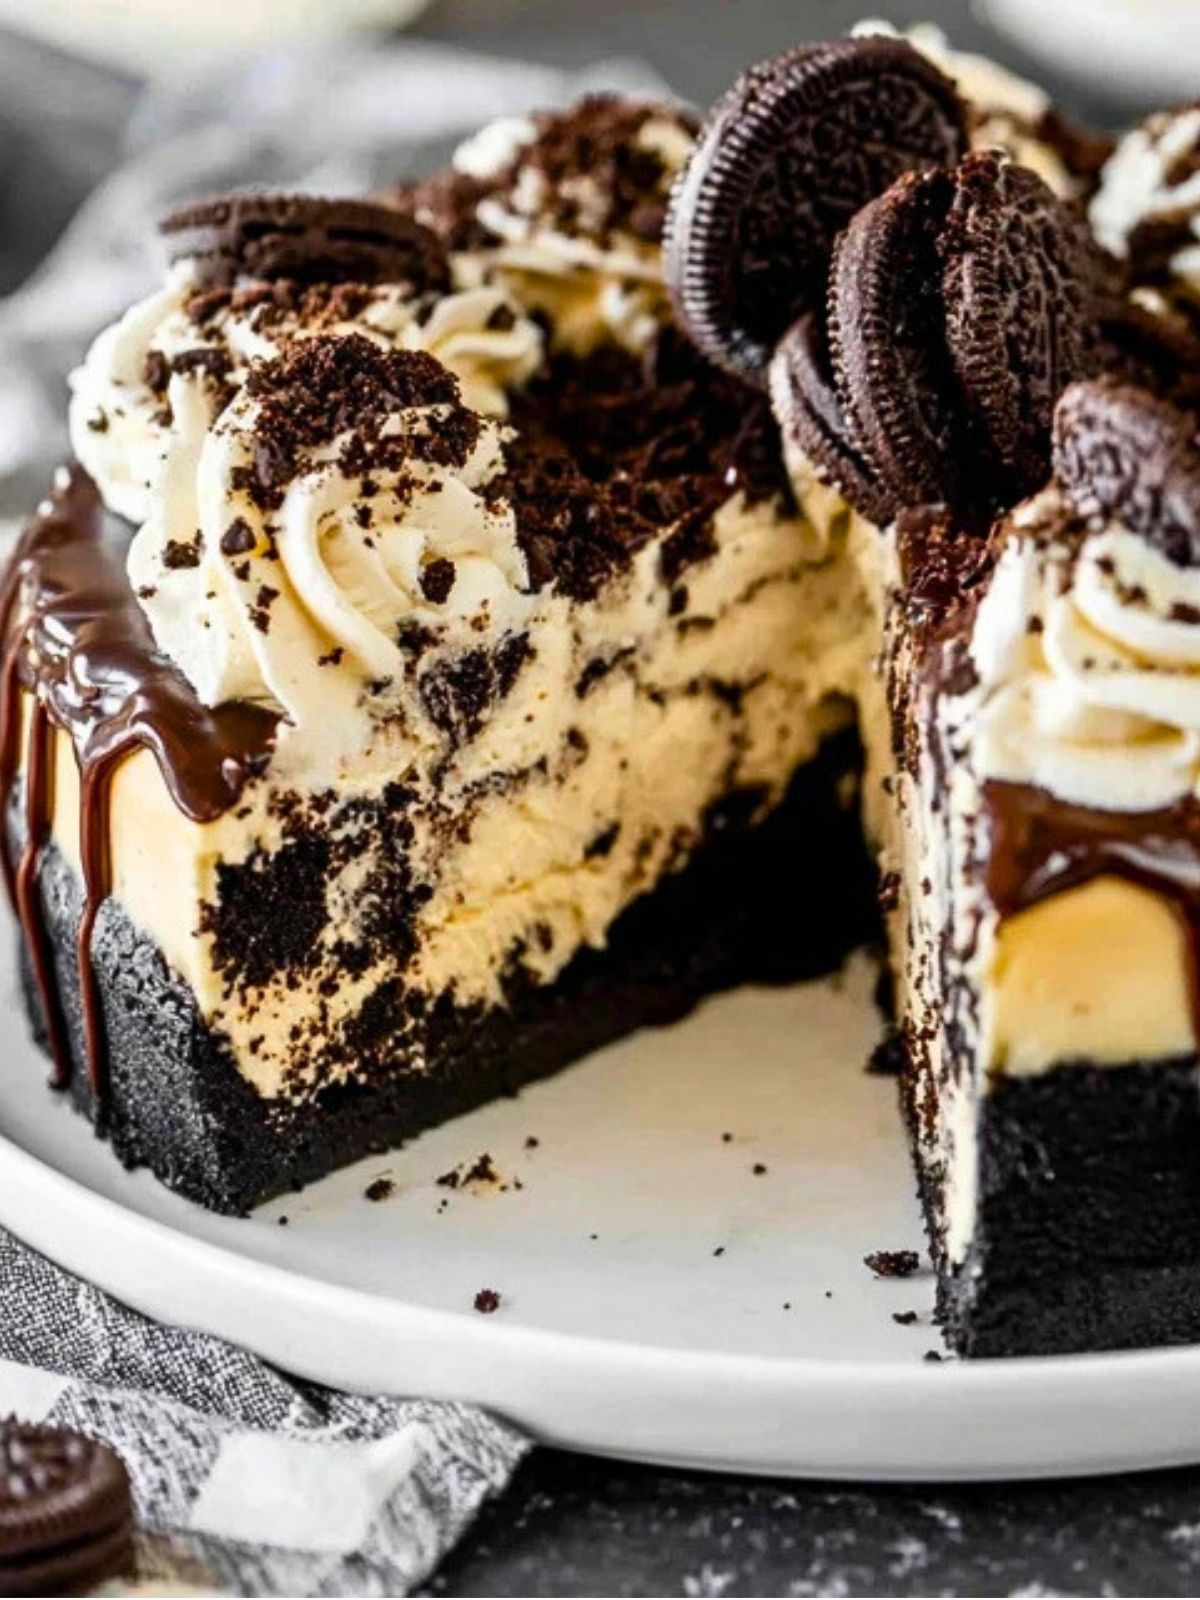
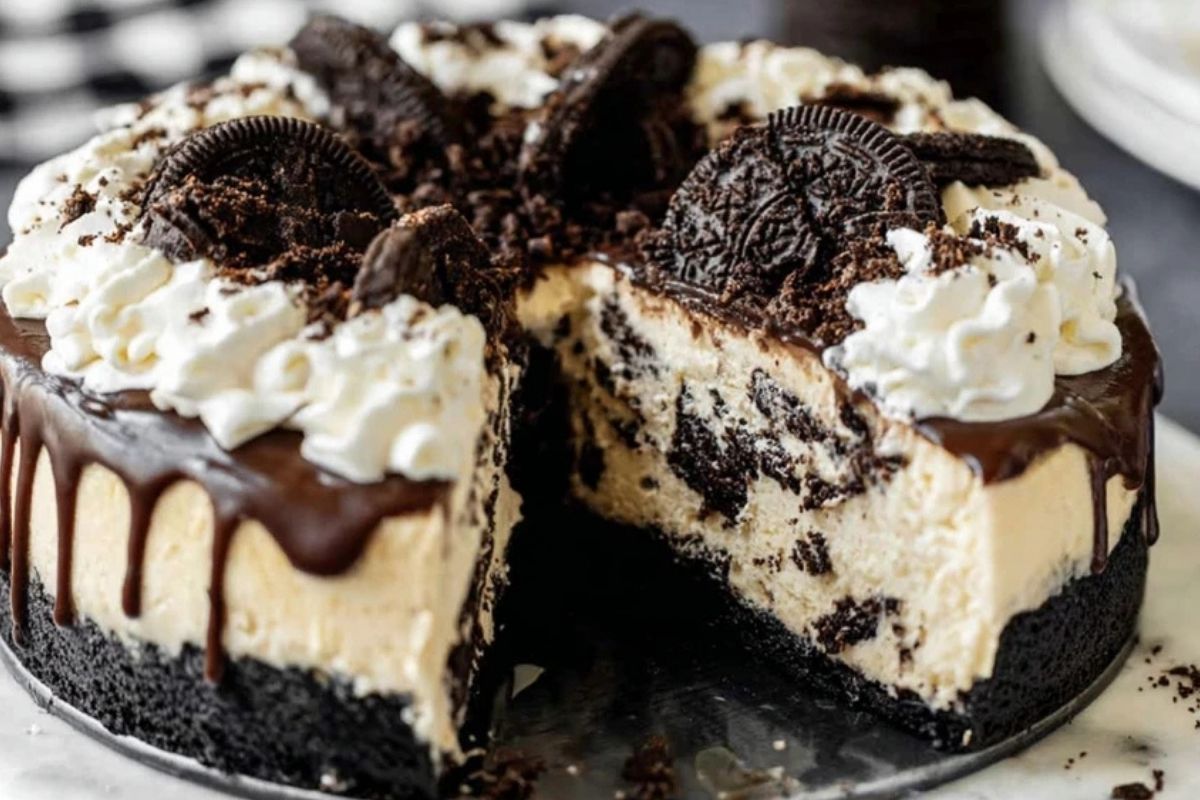
Craving a dessert that looks like it came from a bakery but takes almost no effort to make? This Easy Oreo Cheesecake is your dream come true. It’s packed with crushed Oreo cookies, layered in a no-bake creamy cheesecake filling, and nestled in a deep, chocolate cookie crust. Perfect for celebrations or casual sweet cravings, it’s a crowd-pleaser that disappears fast.
With its rich vanilla and chocolate flavor, whipped topping, and decadent Oreo chunks, this cheesecake has all the texture and sweetness of a baked version without ever turning on your oven. Whether you’re making it for a weekend treat or bringing it to a party, expect it to be the first thing gone from the dessert table.
Preparation Phase & Tools to Use
To make the perfect Easy Oreo Cheesecake, a few essential tools will help make the process smooth and mess-free:
- Springform Pan: A must-have for cheesecakes, this allows easy release and creates that perfect round shape with tall sides.
- Electric Mixer or Stand Mixer: For achieving that ultra-smooth, creamy filling, a mixer is non-negotiable.
- Food Processor or Zip-top Bag with Rolling Pin: Needed to crush the Oreo cookies for both the crust and the filling.
- Rubber Spatula: Ideal for folding whipped cream into the cheesecake mixture without deflating it.
- Mixing Bowls: At least two medium-to-large bowls are essential for organizing your crust and filling components.
These tools aren’t just convenient—they’re critical for getting that professional, bakery-style finish while keeping the process beginner-friendly.

Ingredients for the Easy Oreo Cheesecake
- Oreo Cookies: The soul of this dessert. Crushed Oreos form both the buttery crust and the irresistible cookie-filled cheesecake base.
- Cream Cheese: Provides that signature tangy richness. Room temperature cream cheese blends easier and results in a silky filling.
- Granulated Sugar: Just enough to balance the tang of the cream cheese and sweeten the base without overpowering the Oreo flavor.
- Vanilla Extract: Enhances the cheesecake’s depth and brings out the creamy flavor notes.
- Heavy Whipping Cream: Whipped to soft peaks and folded into the filling to create a light, airy texture.
- Butter (unsalted): Melted and mixed with crushed Oreos to form a firm, chocolatey crust.
How To Make the Easy Oreo Cheesecake
Step 1: Make the Crust
Crush about 24 Oreo cookies using a food processor or a zip-top bag with a rolling pin. Mix the crumbs with melted butter and press into the base of a springform pan. Chill in the fridge for 20 minutes to set.
Step 2: Beat the Cream Cheese Base
In a large mixing bowl, beat the softened cream cheese and granulated sugar until smooth and creamy. Add vanilla extract and mix again until fully incorporated.
Step 3: Whip the Cream
In a separate bowl, whip the heavy cream until soft peaks form. This adds the fluffiness to the filling.
Step 4: Fold and Layer
Gently fold the whipped cream into the cream cheese mixture using a spatula. Once blended, stir in additional crushed Oreo chunks. Pour the mixture over the chilled crust and smooth the top.
Step 5: Chill and Serve
Refrigerate the cheesecake for at least 6 hours or overnight for best results. Top with whipped cream, extra Oreo cookies, and a drizzle of chocolate syrup just before serving.
Serving and Storing Your Easy Oreo Cheesecake
Once chilled and topped, this Easy Oreo Cheesecake is best served cold. Slice using a knife dipped in hot water for smooth, clean cuts through the thick cookie crust and creamy filling. For extra flair, garnish each slice with a dollop of whipped cream and a halved Oreo.
To store, cover the cheesecake tightly with plastic wrap or transfer slices into an airtight container. It stays fresh in the fridge for up to 5 days. You can also freeze individual slices—wrap them in plastic wrap and place in freezer bags for up to 2 months. Just thaw overnight in the fridge before serving.
Frequently Asked Questions
Can I use store-brand sandwich cookies instead of Oreos?
Yes, most chocolate sandwich cookies will work just fine. However, name-brand Oreos tend to hold up better in texture and flavor.
Is this cheesecake really no-bake?
Absolutely! No oven required. Just a bit of time in the fridge to set, and it’s ready to serve.
Can I use whipped topping instead of homemade whipped cream?
You can. If you’re short on time, whipped topping like Cool Whip works well, though homemade adds a richer flavor and smoother texture.
How long does it need to chill before serving?
At least 6 hours, but overnight is ideal. This gives the cheesecake time to firm up and the flavors to meld beautifully.
Can I make this cheesecake gluten-free?
Yes—simply substitute gluten-free chocolate sandwich cookies and double-check that your other ingredients (like vanilla extract) are certified gluten-free.
Want More Cheesecake Dessert Ideas?
If you loved the creamy layers and cookie crunch of this Easy Oreo Cheesecake, there are plenty more rich and dreamy treats to explore.
You might also enjoy the Cheesecake Deviled Strawberries for a fruity twist that blends cheesecake filling with fresh berries. Or try the Mini Cinnamon Roll Cheesecakes—a warm-spiced, bite-sized take on dessert perfection.
For a citrusy spin, don’t miss the Irresistible Blueberry Lime Cheesecake Cupcakes, which balance tangy lime with juicy berries. And if you’re drawn to classic flavors, the Simple Strawberry Cheesecake with Fresh Strawberries keeps it timeless with seasonal fruit.
Pin and Tell Me How Yours Turned Out
You can save this to your dessert boards for later. Just hit the Pin button.
If you give this recipe a try, I’d love to hear how it turned out! Did you fold in extra cookies? Go wild with toppings? Leave a comment below and share your spin. And if you’re looking for more sweet inspiration, check out my daily recipe posts on Pinterest at LadyPlate.

Easy Oreo Cheesecake
Description
This Easy Oreo Cheesecake is a creamy, no-bake dessert packed with crushed Oreo cookies and layered into a velvety smooth cheesecake filling. Nestled in a rich chocolate cookie crust and topped with whipped cream and extra cookies, it’s an indulgent showstopper that requires no oven time—perfect for any occasion.
Ingredients
24 Oreo cookies, crushed (for the crust)
5 tablespoons unsalted butter, melted
16 ounces cream cheese, softened
3/4 cup granulated sugar
2 teaspoons vanilla extract
1 1/4 cups heavy whipping cream
8 Oreo cookies, coarsely chopped (for the filling)
Whipped cream, for topping
Extra Oreos and chocolate syrup, for garnish
Instructions
1. Crush 24 Oreo cookies using a food processor or place in a zip-top bag and crush with a rolling pin.
2. Mix the crumbs with melted butter until evenly combined.
3. Press the crust mixture firmly into the bottom of a springform pan.
4. Chill in the refrigerator for 20 minutes to set.
5. In a large bowl, beat the softened cream cheese and sugar until smooth and creamy.
6. Add the vanilla extract and beat again until fully incorporated.
7. In a separate bowl, whip the heavy cream until soft peaks form.
8. Gently fold the whipped cream into the cream cheese mixture with a rubber spatula.
9. Stir in the 8 chopped Oreo cookies.
10. Pour the cheesecake filling over the chilled crust and smooth the top.
11. Refrigerate the cheesecake for at least 6 hours or overnight for best results.
12. Before serving, top with whipped cream, extra Oreos, and drizzle with chocolate syrup.
13. Slice with a hot knife for clean cuts and serve cold.
Notes
Make sure your cream cheese is fully softened before mixing to prevent lumps.
Chill overnight for the best texture and clean slices.
Use a hot, clean knife for each slice to get perfect cuts.