


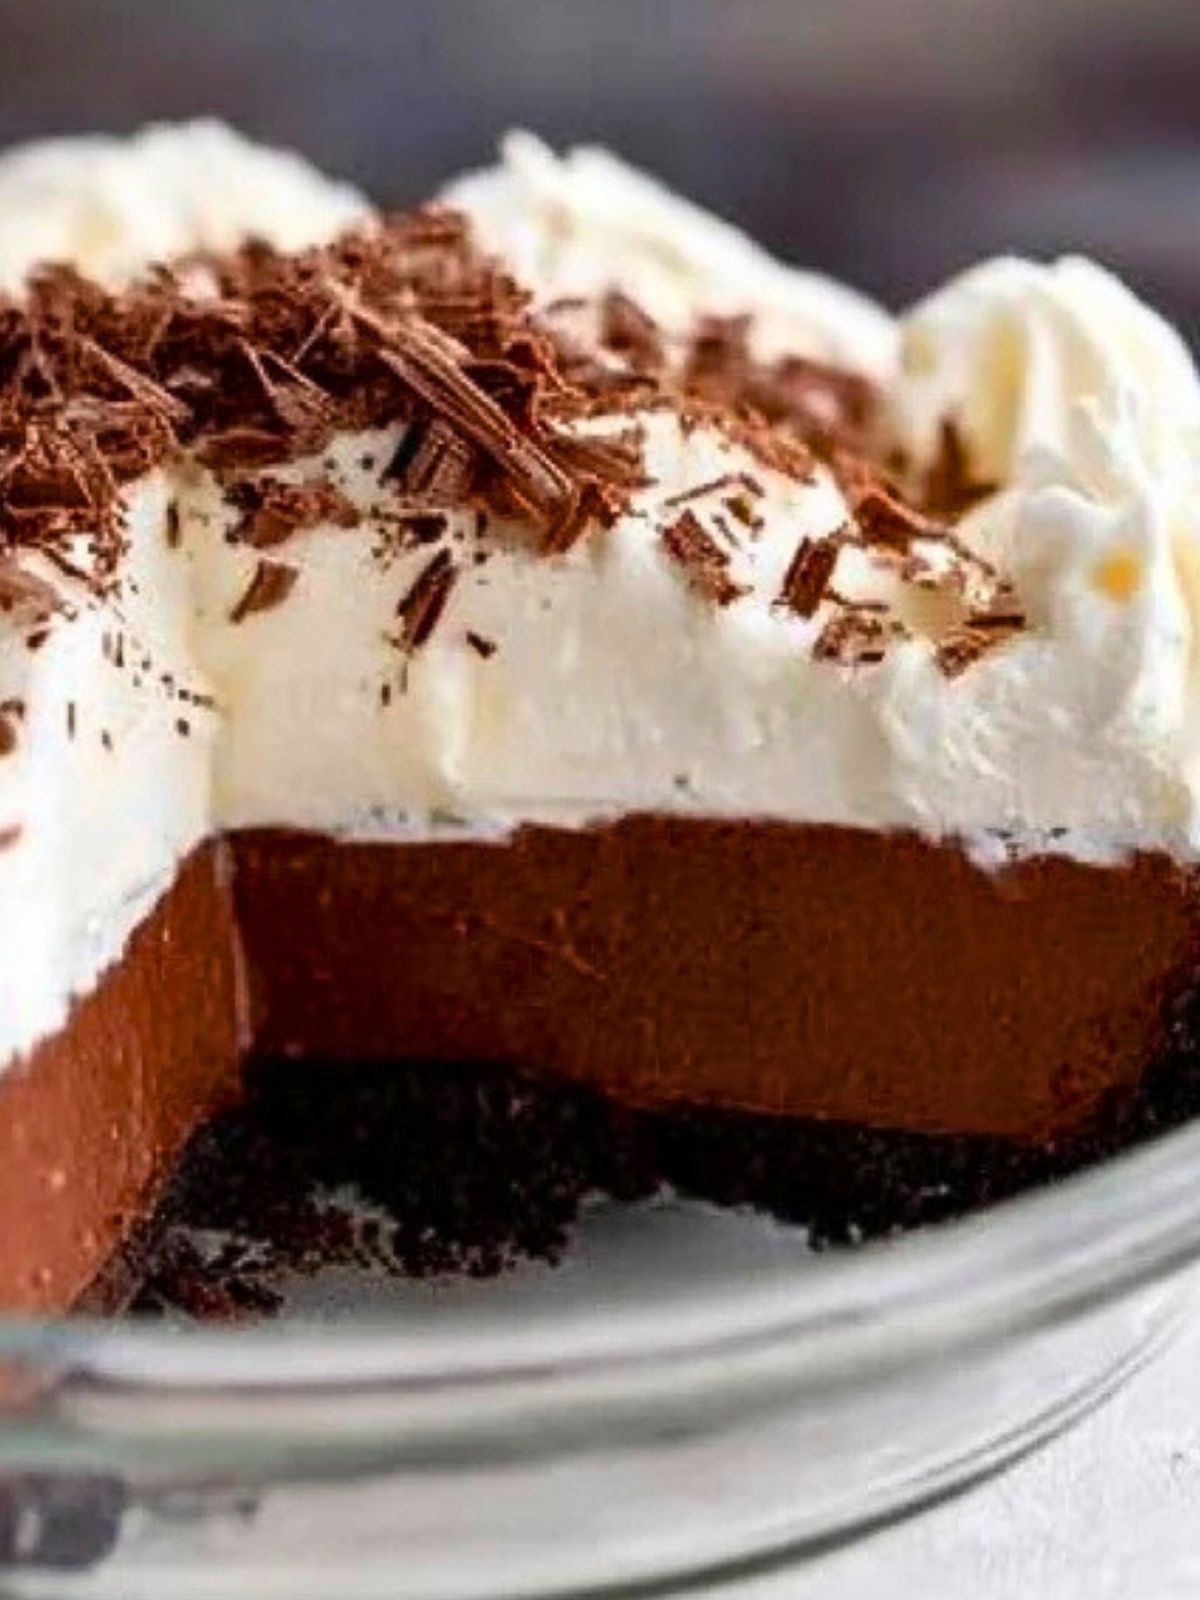
Craving a no-fuss dessert that delivers big chocolate flavor with silky texture and a cloud of whipped cream on top? This Easy Chocolate Cream Pie is your answer. It’s rich without being heavy, creamy without being too sweet, and simple enough for even beginner bakers to master. Whether you’re making it for a dinner party or just a Tuesday night indulgence, this pie has a way of disappearing fast.
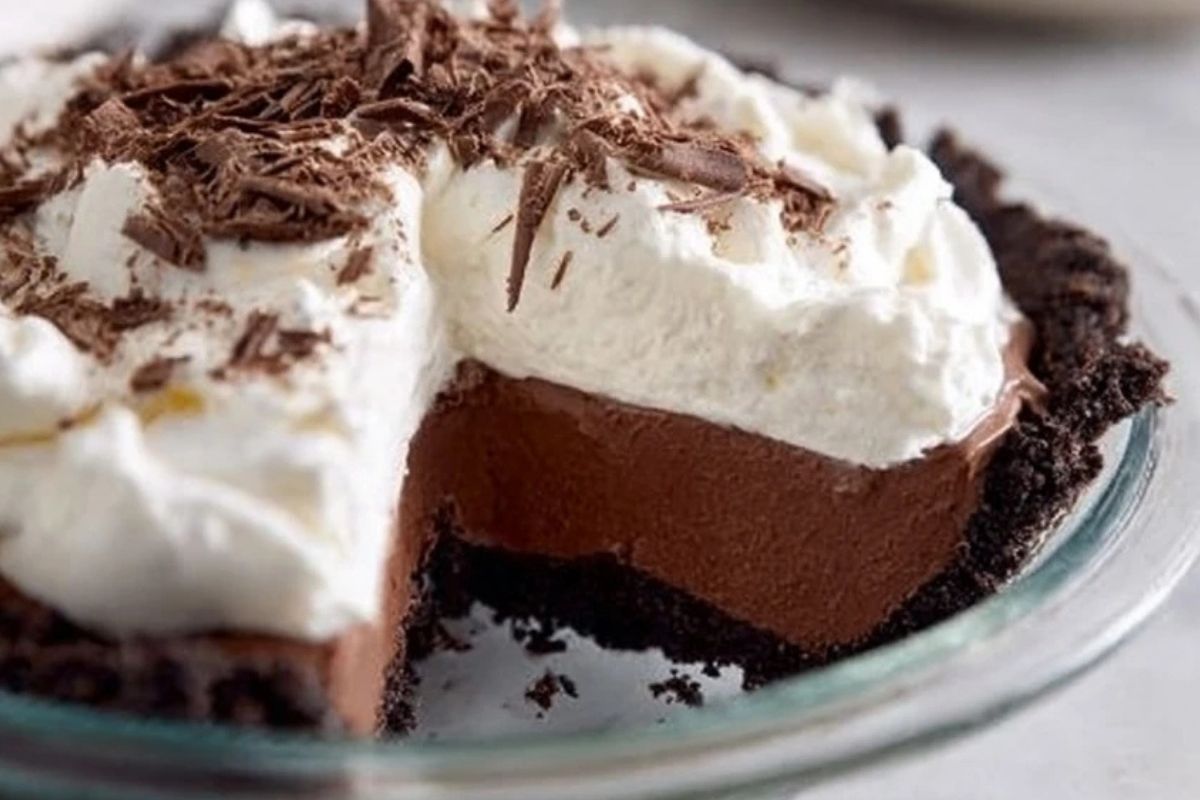
The real magic is in the contrast—a buttery chocolate cookie crust cradling a luscious dark chocolate filling, all topped with pillowy whipped cream and chocolate curls. You don’t need to turn on the oven (except for a quick crust bake), and the chilling time does all the hard work for you. Get ready to impress without stress.
Preparation Phase & Tools to Use
To make this Easy Chocolate Cream Pie seamless and mess-free, you’ll want to gather a few essential tools. Each plays a role in ensuring smooth texture and easy handling:
- 9-inch Pie Dish: A glass pie dish is best to monitor crust browning and give the pie structure.
- Food Processor: This makes quick work of turning chocolate cookies into fine crumbs for a cohesive crust.
- Saucepan: Needed for heating the custard base, a heavy-bottomed pan prevents scorching.
- Whisk: Essential for stirring the filling smoothly to avoid lumps.
- Fine Mesh Strainer: Great for straining the custard for that ultra-silky finish.
- Stand Mixer or Hand Mixer: For whipping cream to soft peaks without breaking a sweat.
- Offset Spatula: Helps spread whipped topping evenly for that bakery-style finish.
Having everything ready before you start makes the process not just easier, but genuinely enjoyable.

Ingredients for the Easy Chocolate Cream Pie
Each component in this pie brings richness and structure:
- Chocolate Sandwich Cookies: These create the classic Oreo-style crust that stays firm and adds crunch.
- Butter: Melted butter binds the cookie crumbs for a sturdy crust.
- Whole Milk: Provides creaminess to the chocolate custard base.
- Heavy Cream: Enriches the filling and is whipped for the topping.
- Egg Yolks: Help thicken the custard while adding richness.
- Granulated Sugar: Sweetens the custard without overpowering the chocolate.
- Cornstarch: Thickens the filling to the perfect silky texture.
- Dark Chocolate: Gives depth and intensity to the flavor.
- Vanilla Extract: Balances the richness with a warm aroma.
- Salt: Just a pinch enhances all the other flavors.
How To Make the Easy Chocolate Cream Pie
Step 1: Prepare the Crust
Crush chocolate sandwich cookies in a food processor until fine. Mix with melted butter, then press the mixture into a 9-inch pie dish. Bake at 350°F for about 10 minutes, then cool completely.
Step 2: Make the Custard Base
In a saucepan, whisk together milk, cream, sugar, egg yolks, and cornstarch. Cook over medium heat, whisking constantly until the mixture thickens and bubbles.
Step 3: Add Chocolate and Chill
Remove from heat and stir in chopped dark chocolate, vanilla extract, and salt. Strain the mixture through a fine mesh strainer into the cooled crust. Smooth the top and chill for at least 4 hours.
Step 4: Whip and Top
Whip cold heavy cream until soft peaks form. Spread over the chilled chocolate filling and garnish with chocolate shavings or curls.
Step 5: Serve
Slice with a warm knife for clean cuts and enjoy every velvety bite.
Serving and Storing Your Easy Chocolate Cream Pie
This pie is best served cold, straight from the fridge. For clean slices, dip your knife in warm water and wipe it clean between cuts. It pairs beautifully with a cup of espresso or fresh berries on the side.
To store, keep the pie covered in the refrigerator for up to 4 days. If you’re planning to make it ahead, you can prepare the crust and filling a day in advance, then add the whipped topping just before serving for the freshest texture.
Avoid freezing, as the whipped topping can lose its volume and the custard texture may change once thawed.
Frequently Asked Questions
How do I prevent my custard from curdling?
Be sure to whisk constantly and cook over medium heat. If it gets too hot too quickly, the eggs can scramble. A fine mesh strainer at the end guarantees a silky result.
Can I use semi-sweet chocolate instead of dark?
Yes, though it will yield a sweeter pie. Dark chocolate gives a richer, deeper flavor, but semi-sweet works well for those who prefer a milder taste.
Can I use a store-bought crust?
Absolutely. A pre-made chocolate crust saves time. However, making your own lets you control thickness and flavor.
What can I use instead of cornstarch?
Arrowroot or flour can be used as thickeners, though they may alter the texture slightly. Cornstarch gives the smoothest finish.
How long does it take to chill properly?
At least 4 hours is recommended, but overnight chilling gives the best texture and flavor development.
Can I make this dairy-free?
You can substitute with full-fat coconut milk and a dairy-free whipped topping. Just note the flavor will have coconut undertones.
Want More Chocolate Dessert Ideas?
Love the indulgent layers of this pie? You’ll also enjoy the Chocolate Peanut Butter Dream Bars—they’re no-bake and packed with a creamy peanut butter twist. For something more traditional but just as comforting, check out the Indulgent Chocolate Chess Pie.
Looking for variety in texture? The Mini Cinnamon Roll Cheesecakes combine creamy and spiced flavors in cupcake form, while Decadent Chocolate S’mores Cupcakes offer that gooey marshmallow middle you didn’t know you needed.
Or if fruity meets rich is more your thing, go for the No Bake Banana Pudding Cheesecake—a perfect crowd-pleaser with a creamy center.
Pin and Tell Me How Yours Turned Out
You can save this to your dessert boards for next time. Just click the Pin button.
If you make it, I’d love to hear how it turned out. Did you use semi-sweet or stick with dark chocolate? Did you swirl the topping or go clean and classic?
Leave a comment below. And if you’re hungry for more, find my daily creations on Pinterest @LadyPlate!

Easy Chocolate Cream Pie
- Total Time: 30 minutes + chilling
- Yield: 8 servings
- Diet: Vegetarian
Description
A silky, rich chocolate custard fills a crisp chocolate cookie crust and is topped with freshly whipped cream and chocolate curls. This no-fuss pie is perfect for celebrations or a weeknight dessert craving—easy to make, incredibly indulgent, and guaranteed to impress.
Ingredients
24 chocolate sandwich cookies
5 tablespoons unsalted butter, melted
2 cups whole milk
1 cup heavy cream
4 large egg yolks
¾ cup granulated sugar
¼ cup cornstarch
6 ounces dark chocolate, chopped
1½ teaspoons vanilla extract
⅛ teaspoon salt
1 cup heavy cream (for topping)
1 tablespoon powdered sugar (for topping)
Chocolate curls (optional, for garnish)
Instructions
1. Preheat oven to 350°F.
2. Crush chocolate sandwich cookies in a food processor until finely ground.
3. Combine crumbs with melted butter and press into a 9-inch pie dish.
4. Bake for 10 minutes and cool completely.
5. In a medium saucepan, whisk together milk, 1 cup cream, sugar, egg yolks, and cornstarch.
6. Cook over medium heat, whisking constantly, until thickened and bubbling.
7. Remove from heat and stir in chopped chocolate, vanilla, and salt until smooth.
8. Strain mixture through a fine mesh sieve into cooled crust.
9. Smooth the surface and chill for at least 4 hours or overnight.
10. Whip remaining 1 cup of cream with powdered sugar until soft peaks form.
11. Spread whipped cream over pie and garnish with chocolate curls.
12. Serve chilled with a warm knife for clean slices.
Notes
Chill overnight for the cleanest, most sliceable results.
Use a fine mesh strainer to remove any lumps from the custard before chilling.
A warm knife ensures neat slices when serving—just dip and wipe between cuts.
- Prep Time: 20 minutes
- Cook Time: 10 minutes
- Category: Dessert
- Method: No-bake with baked crust
- Cuisine: American
Nutrition
- Serving Size: 1 slice
- Calories: 430
- Sugar: 25g
- Sodium: 220mg
- Fat: 30g
- Saturated Fat: 18g
- Unsaturated Fat: 10g
- Trans Fat: 0g
- Carbohydrates: 34g
- Fiber: 2g
- Protein: 5g
- Cholesterol: 105mg
