
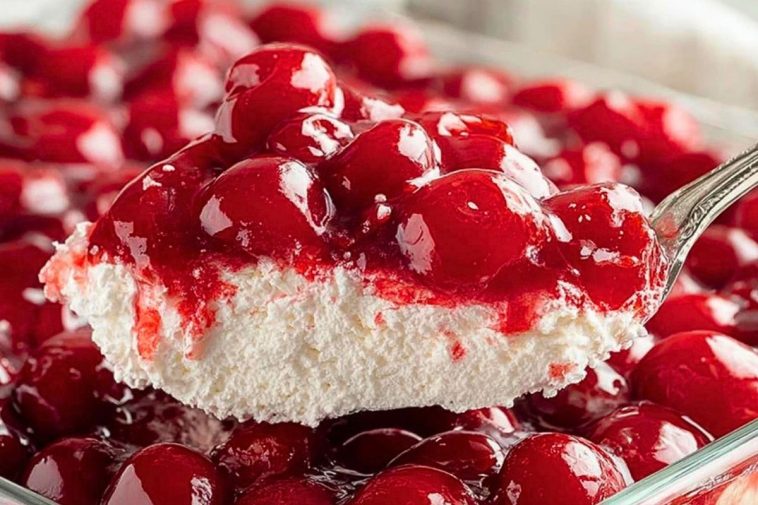

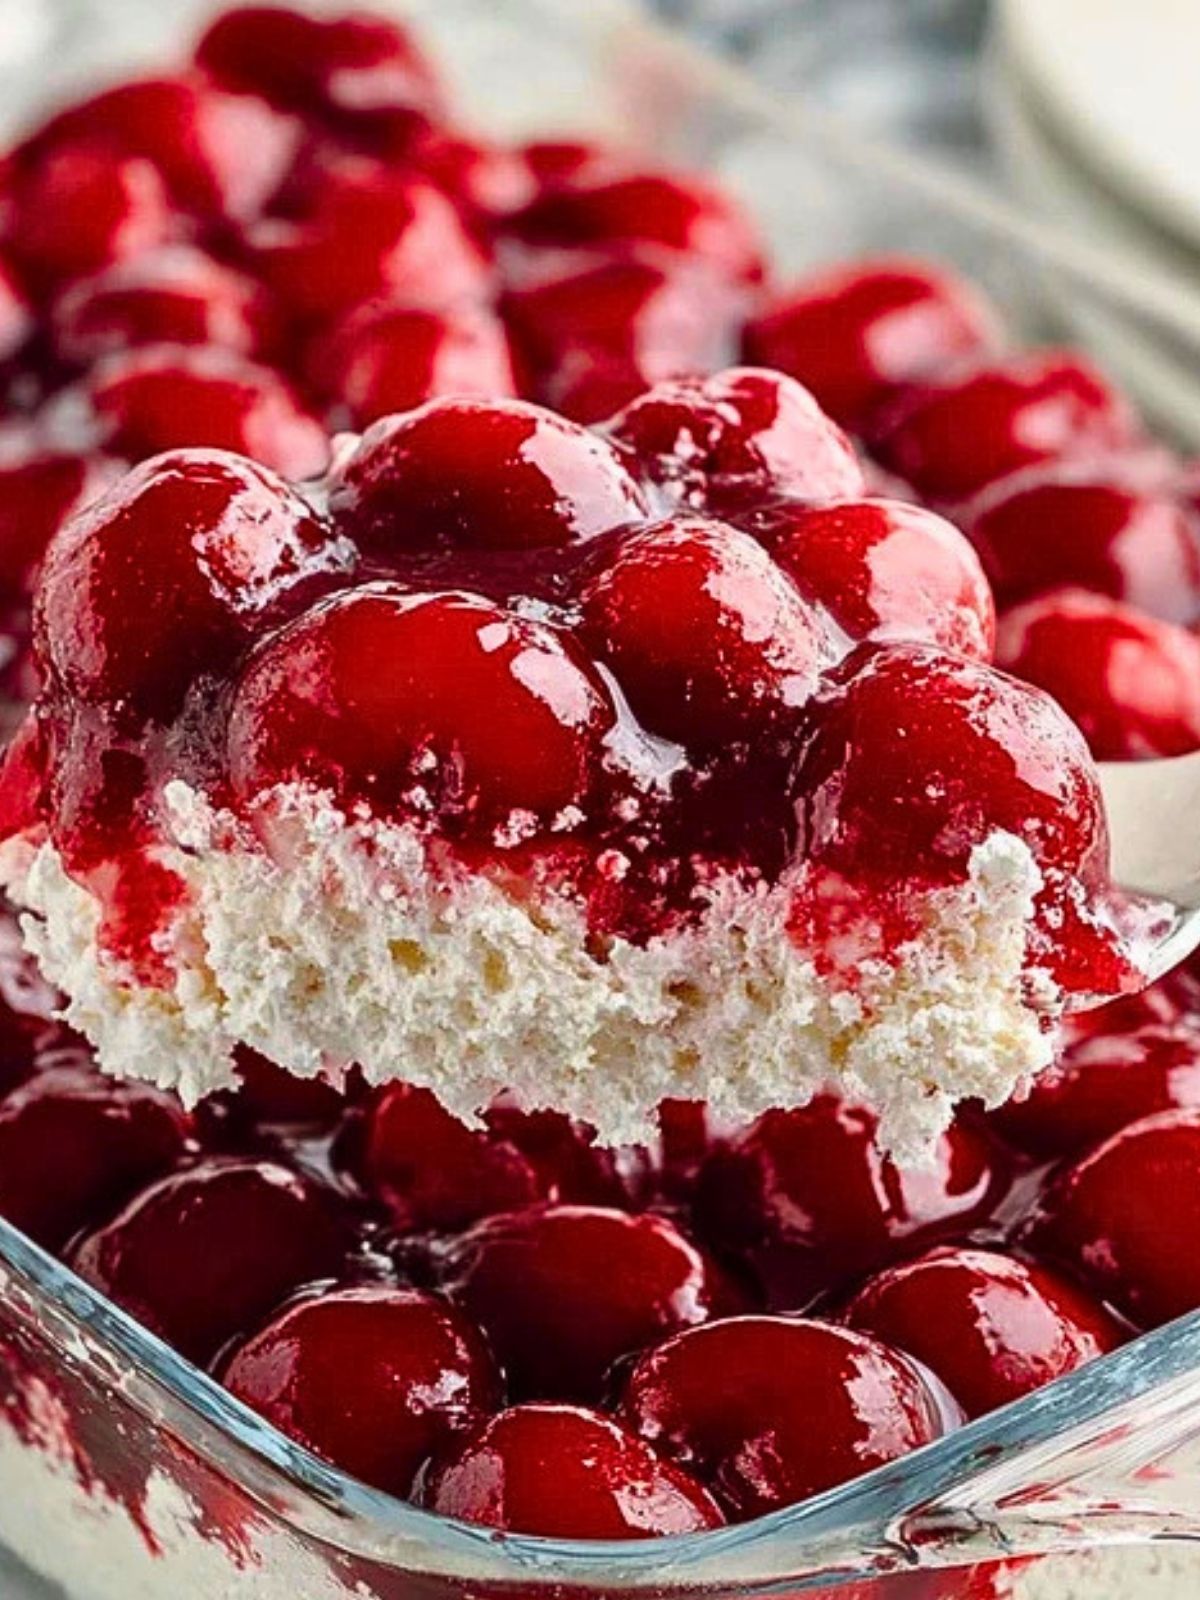
Can a dessert this pretty really be one of the easiest chilled treats to make? Cherries in the Snow answers that question with a creamy, fluffy base and a glossy cherry topping that looks impressive in the dish and tastes even better by the spoonful.
This nostalgic no-bake dessert is cool, sweet, light, and perfect for potlucks, holidays, church suppers, summer gatherings, or any time you want a make-ahead treat without turning on the oven. The contrast between the rich cream cheese layer and the bright cherry topping gives every bite that classic old-fashioned dessert charm.
Preparation Phase & Tools to Use
Before you start assembling Cherries in the Snow, it helps to have everything softened, measured, and ready to go. Since this is a no-bake dessert, the texture depends on good mixing and gentle folding rather than oven time, so the right tools matter.
A large mixing bowl gives you enough room to beat the cream cheese layer until smooth without splashing. A hand mixer or stand mixer is especially important because it helps remove lumps from the cream cheese and creates that airy, cloud-like filling. A rubber spatula is useful for folding in the whipped topping gently so the mixture stays light instead of becoming dense. Measuring cups help keep the balance right, especially for the milk and powdered sugar. A 9×13-inch glass dish works well for layering and serving because it shows off the creamy filling and ruby-red cherries beautifully. You may also want an offset spatula or the back of a spoon to spread the filling evenly, plus plastic wrap or a lid for chilling the dessert until set.

Ingredients for the Cherries in the Snow
Each ingredient in Cherries in the Snow has a simple job, and together they create the dessert’s signature texture and flavor.
Cream cheese forms the rich and tangy foundation of the filling. It adds body and gives the dessert that cheesecake-like taste that pairs so well with cherries.
Powdered sugar sweetens the filling while blending smoothly into the cream cheese. It also helps keep the texture silky instead of grainy.
Vanilla extract adds warmth and rounds out the dairy flavors. Even a small amount makes the filling taste more complete.
Cold milk loosens the cream cheese mixture just enough so it blends easily and stays soft and spoonable after chilling.
Whipped topping gives Cherries in the Snow its light, fluffy texture. It lifts the filling and creates the airy contrast that makes the dessert feel delicate.
Mini marshmallows add a soft, sweet bite throughout the filling. They also help create that vintage dessert texture many people love.
Crushed pineapple, well drained, brings a juicy tropical brightness that keeps the filling from tasting too heavy. The fruit also adds moisture and a subtle tang.
Cherry pie filling is the star topping. It gives the dessert its glossy finish, rich cherry flavor, and the dramatic red layer that makes Cherries in the Snow so eye-catching.
How To Make the Cherries in the Snow
This dessert comes together in simple stages, and each one helps build the final creamy, fruity layers.
Step 1: Soften and Prepare the Base
Let the cream cheese sit at room temperature until soft. Drain the crushed pineapple very well so the filling does not become watery later.
Step 2: Beat the Cream Cheese Mixture
In a large bowl, beat the softened cream cheese until smooth. Add the powdered sugar, vanilla extract, and milk, then mix again until the texture is creamy and lump-free.
Step 3: Fold in the Light Ingredients
Using a spatula, gently fold in the whipped topping until fully incorporated. Fold in the mini marshmallows and drained crushed pineapple, mixing just enough to distribute everything evenly.
Step 4: Spread Into the Dish
Transfer the filling into a 9×13-inch dish. Smooth the top into an even layer so the cherry topping sits neatly across the surface.
Step 5: Add the Cherry Layer
Spoon the cherry pie filling over the top and spread it carefully from edge to edge. This final layer gives Cherries in the Snow its signature look.
Step 6: Chill Before Serving
Cover the dish and refrigerate for at least 4 hours, though overnight is even better. The chilling time helps the flavors settle and makes the dessert easier to scoop.
Serving and Storing Cherries in the Snow
Cherries in the Snow is best served cold, straight from the refrigerator, when the filling is firm and the topping is glossy and fresh. It is a lovely dessert for spring and summer meals, but it also fits right in on Thanksgiving, Christmas, Easter, and other holiday tables. For a pretty presentation, spoon it into dessert bowls or cut it into squares if it has chilled long enough to hold shape well.
Store leftovers covered in the refrigerator for up to 3 days. Because the filling is dairy-based, it should stay chilled until serving time. Freezing is not ideal since the creamy layer can separate and lose its fluffy texture once thawed.
Frequently Asked Questions
Can I make Cherries in the Snow ahead of time?
Yes, and it is actually better that way. Making it several hours ahead or the night before gives the dessert time to chill properly and develop its best texture.
Can I use homemade whipped cream instead of whipped topping?
You can, but stabilized whipped cream works best. Regular whipped cream may deflate faster and make the filling less firm over time.
Do I have to use crushed pineapple?
No, but it adds moisture and a light fruitiness that balances the rich filling. If you leave it out, the dessert will be a bit thicker and sweeter.
Can I use a different pie filling?
Absolutely. Strawberry, blueberry, or raspberry pie filling can work well, though cherry is the classic choice for the traditional version.
Why is my filling too soft?
This usually happens when the pineapple is not drained enough or the dessert has not chilled long enough. Be sure to remove as much liquid as possible before mixing.
Can I make Cherries in the Snow in individual cups?
Yes. It works beautifully in small dessert cups or jars for parties, showers, or easy portioned serving.
Want More Dessert Ideas?
If you enjoy chilled and creamy desserts like Cherries in the Snow, you might also love No-Bake Banana Pudding Cheesecake for another dreamy make-ahead treat with a soft, luscious filling. For fruity dessert lovers, Simple Strawberry Cheesecake with Fresh Strawberries brings the same crowd-pleasing charm with a fresh berry finish.
For bite-sized sweets, Cheesecake Deviled Strawberries are fun, creamy, and perfect for parties. If you want something bright and bakery-style, Irresistible Blueberry Lime Cheesecake Cupcakes offer a tangy fruit twist with a rich cheesecake base. And for another easy no-bake favorite, No-Bake Mini Banana Cream Pies are a great choice when you want individual desserts.
For even more daily recipe inspiration, browse my LadyPlate Pinterest recipe collection and save your favorites for later.
Pin and Tell Me How Yours Turned Out
This is the kind of dessert that deserves a spot on your favorite dessert boards, especially when you need a simple no-bake option for gatherings and holidays. Save it now so it is ready the next time you need an easy make-ahead sweet.
If you make Cherries in the Snow, I would love to hear how it turned out. Did you keep it classic with cherry topping, or try another fruit filling? Did you add extra marshmallows or serve it in individual cups? Share your spin and let others know how you made it your own.


Cherries in the Snow
- Total Time: 4 hours 15 minutes
- Yield: 12 servings
- Diet: Vegetarian
Description
A creamy, fluffy, fruit-topped dessert that feels both nostalgic and effortless, Cherries in the Snow is a perfect easy recipe for holidays, potlucks, summer parties, and make-ahead dessert tables. This no-bake treat layers a sweet cream cheese filling with juicy cherries for one of those classic dessert ideas that works when you need simple food ideas, quick party desserts, easy entertaining recipes, and crowd-pleasing sweet treats.
Ingredients
8 oz cream cheese, softened
1 cup powdered sugar
1 tsp vanilla extract
1/2 cup cold milk
8 oz whipped topping, thawed
2 cups mini marshmallows
20 oz crushed pineapple, well drained
21 oz cherry pie filling
Instructions
1. Beat the softened cream cheese in a large bowl until completely smooth.
2. Add the powdered sugar, vanilla extract, and cold milk, then mix until creamy and lump-free.
3. Fold in the whipped topping gently until the mixture is light and fully combined.
4. Fold in the mini marshmallows and well-drained crushed pineapple.
5. Spread the filling evenly into a 9×13-inch dish.
6. Spoon the cherry pie filling over the top and spread it gently into an even layer.
7. Cover and refrigerate for at least 4 hours, or overnight, before serving.
Notes
Drain the pineapple very well so the filling stays thick and fluffy.
Let the cream cheese soften fully before mixing to avoid lumps.
Chill overnight for the best texture and easiest serving.
- Prep Time: 15 minutes
- Cook Time: 0 minutes
- Category: Dessert
- Method: No-Bake
- Cuisine: American
Nutrition
- Serving Size: 1 serving
- Calories: 244
- Sugar: 27g
- Sodium: 116mg
- Fat: 11g
- Saturated Fat: 7g
- Unsaturated Fat: 3g
- Trans Fat: 0g
- Carbohydrates: 35g
- Fiber: 1g
- Protein: 2g
- Cholesterol: 24mg
